Complete Guide to Configuring Payment Settings on BizTapID: PayPal & Stripe Integration
6 mins read · Updated 01 Oct, 2025
STEP 1: Click on "Payment Configuration"
- Navigate to the "Payment Configuration" section on the BizTapID settings page.
- Ensure to fill in the required fields:
- Paypal Payout Email: Enter your PayPal email.
- Currency: Select your currency (marked with *).
- Time Format: Choose between 12 Hour or 24 Hour format (marked with *).
- Optional settings include toggles for attachments and email notifications.
- Click "Save" to apply your changes.

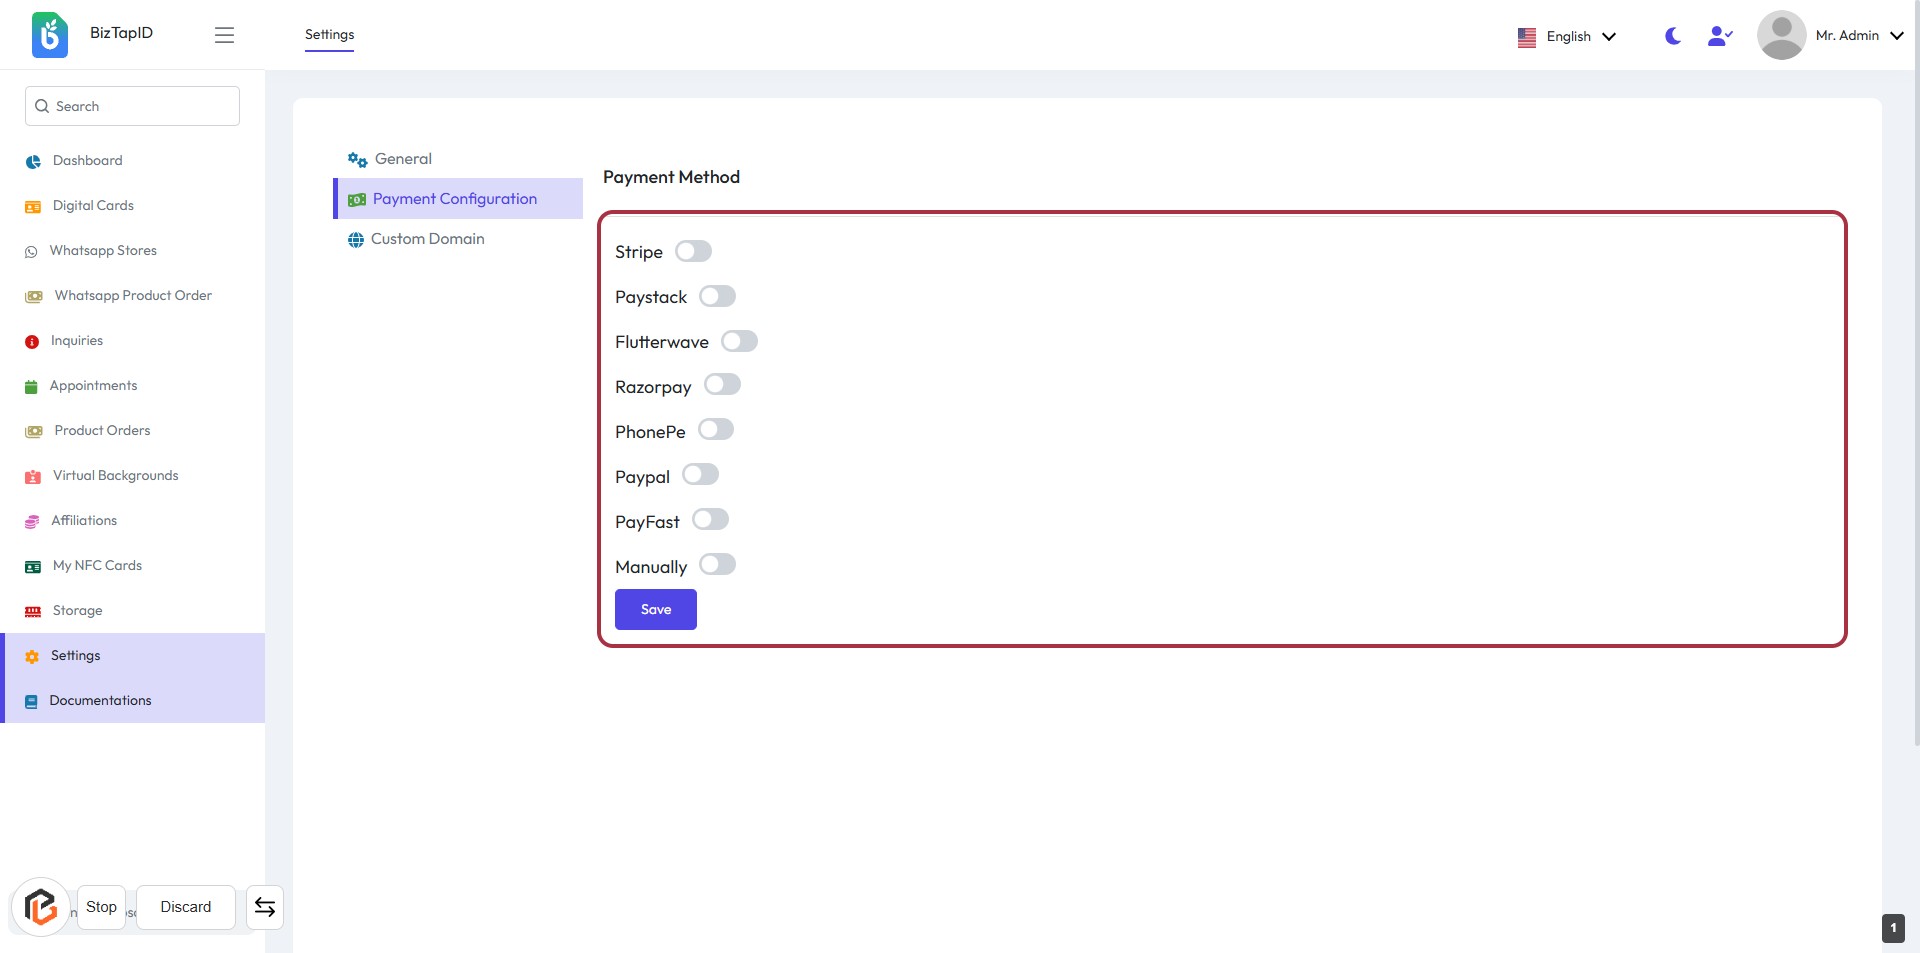
STEP 2: Select "Stripe" as Payment Method
- Click on the "Stripe" option in the Payment Method section.
- Ensure the toggle next to "Stripe" is activated.
- Review other payment options: Paystack, Flutterwave, Razorpay, PhonePe, Paypal, PayFast, and Manually.
- After making selections, proceed to the next step to turn on "Payment Mode."
STEP 3: Click to Turn On "Stripe" Payment Mode
- Navigate to the Payment Method section.
- Locate the Stripe toggle switch.
- Click on the toggle to enable Stripe as your payment method.
- Ensure the toggle changes to indicate that Stripe is now active.
- Proceed to the next step to enter your Stripe key.

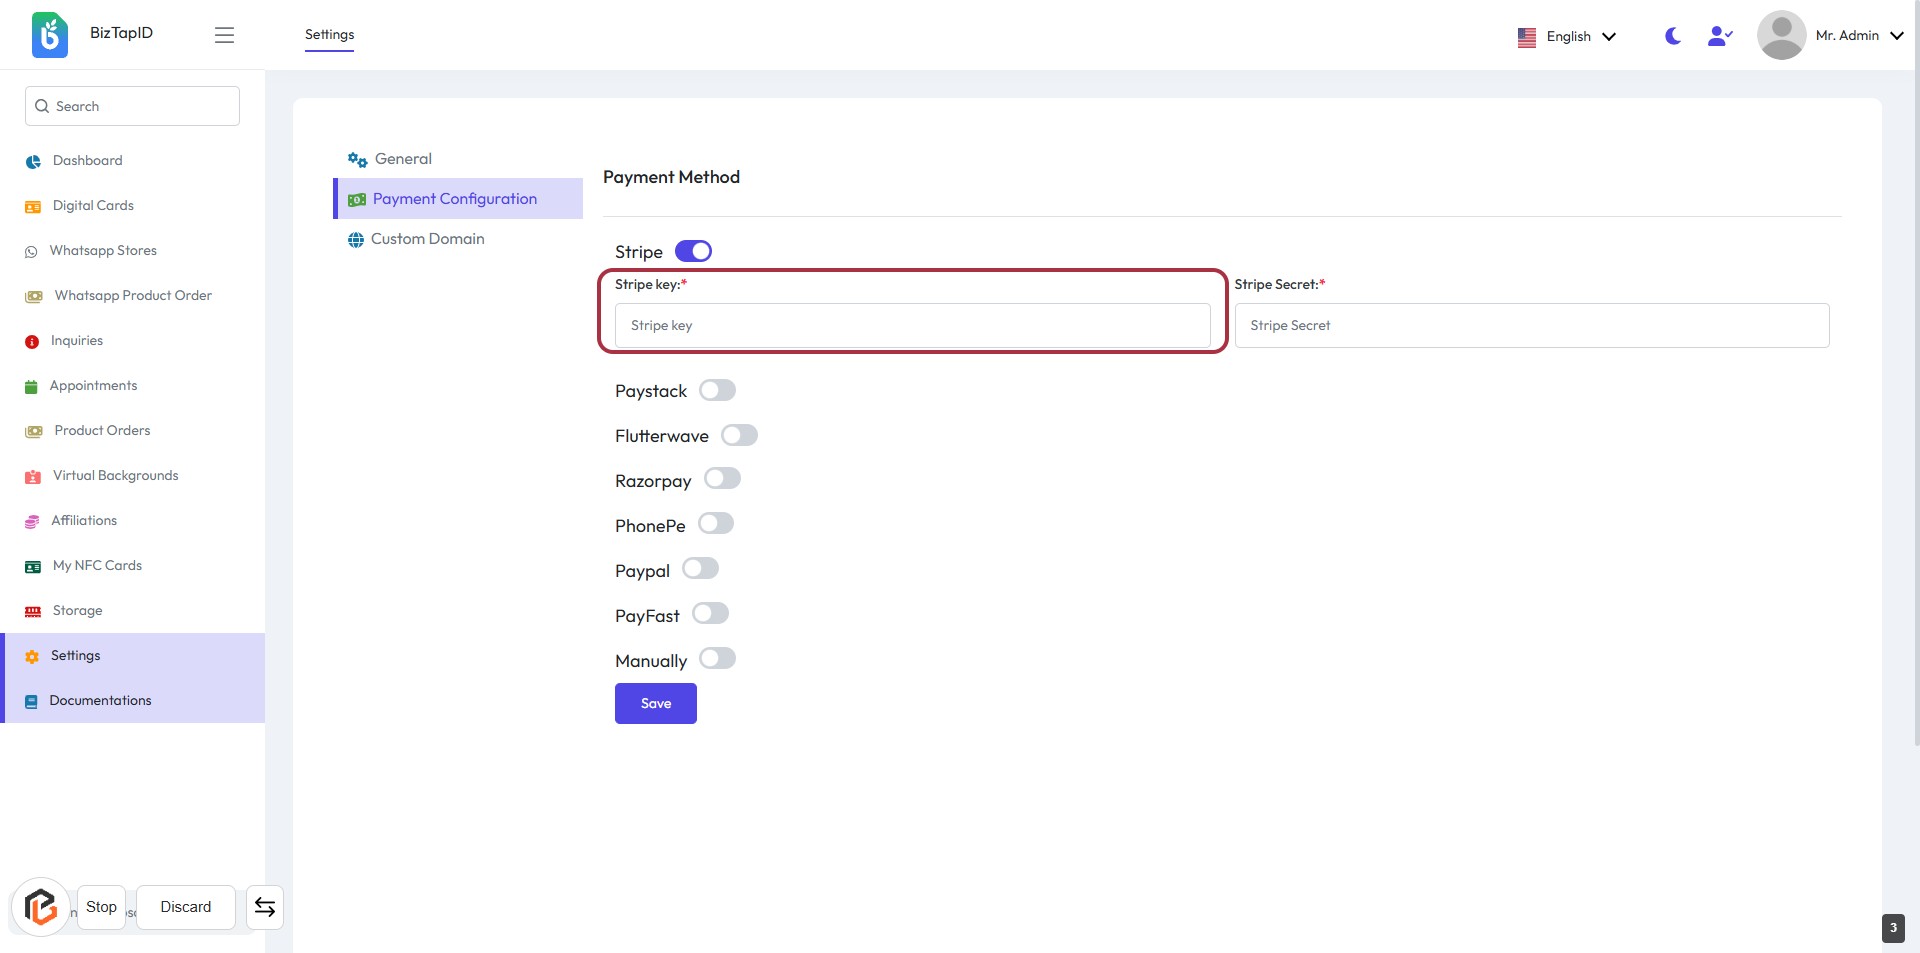
STEP 4: Enter "Stripe Key"
- Click on the highlighted area labeled "Stripe key:*".
- Input the required Stripe key in the provided field.
- Ensure that the field is filled as it is marked with an asterisk (*), indicating it is mandatory.
- After entering the key, proceed to the next step to enter the "Stripe Secret".
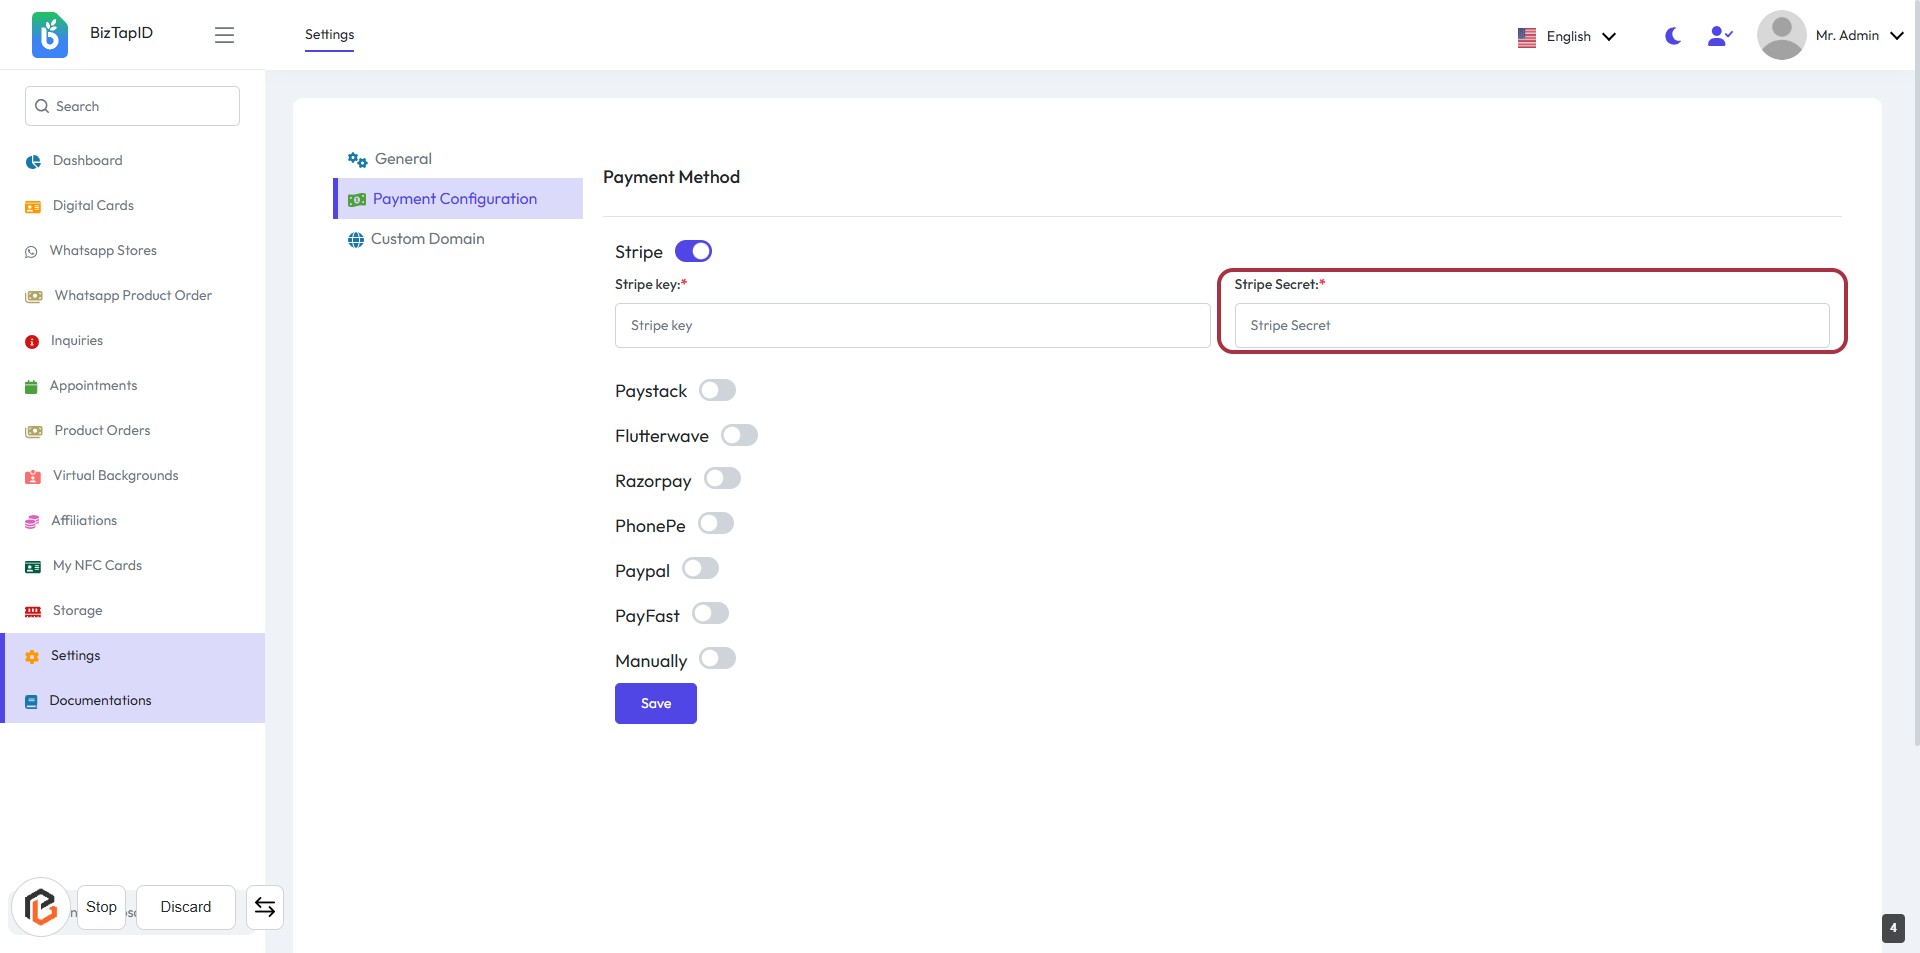
STEP 5: Enter "Stripe Secret"
- Click on the highlighted area labeled "Stripe Secret:".
- Ensure to fill in the required field marked with an asterisk (*).
- Review the input for accuracy before proceeding.
- After entering the information, continue to the next step by clicking the "Save" button.
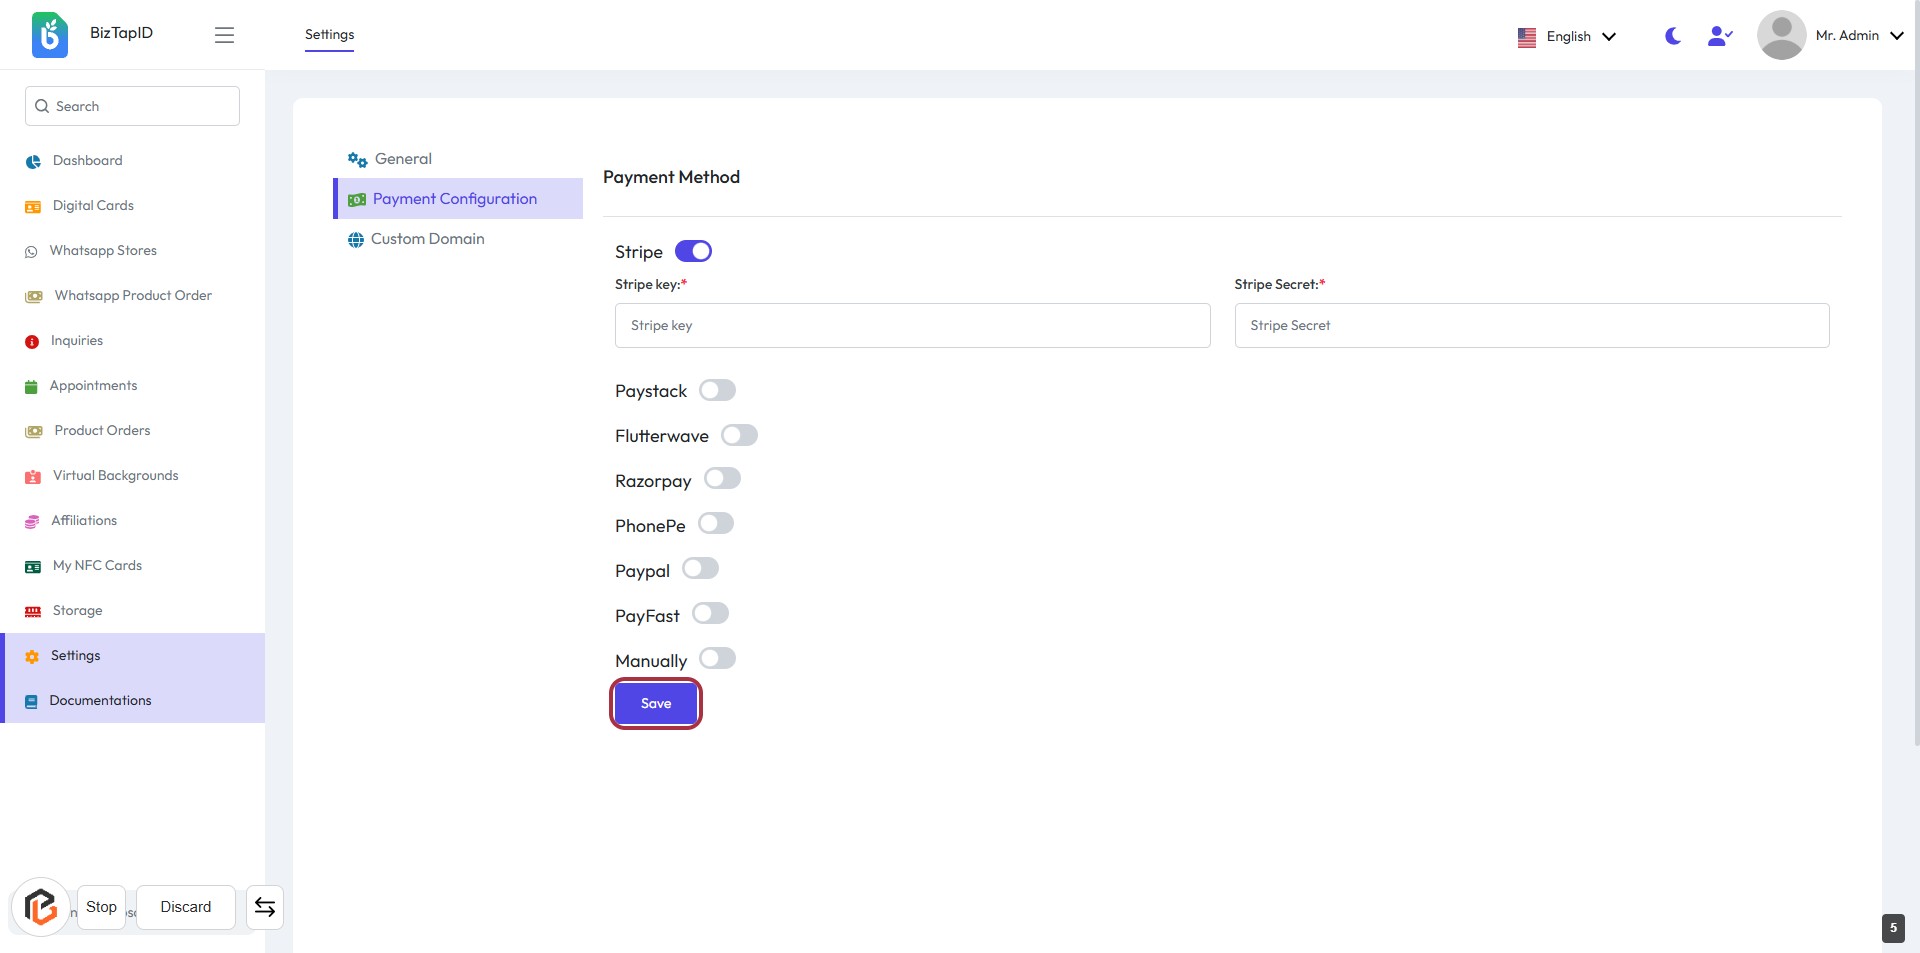
STEP 6: Click on "Save" Button to Finalize Payment Configuration
- Ensure all required fields (marked with *) are filled, including "Stripe Secret."
- Review your entries for accuracy.
- Click the Save button located at the bottom of the form to save your settings.
- Confirm that a success message appears to indicate successful saving.