Step-by-Step Guide to Submitting and Managing Inquiries on BizTapID Digital Cards
13 mins read · Updated 01 Oct, 2025
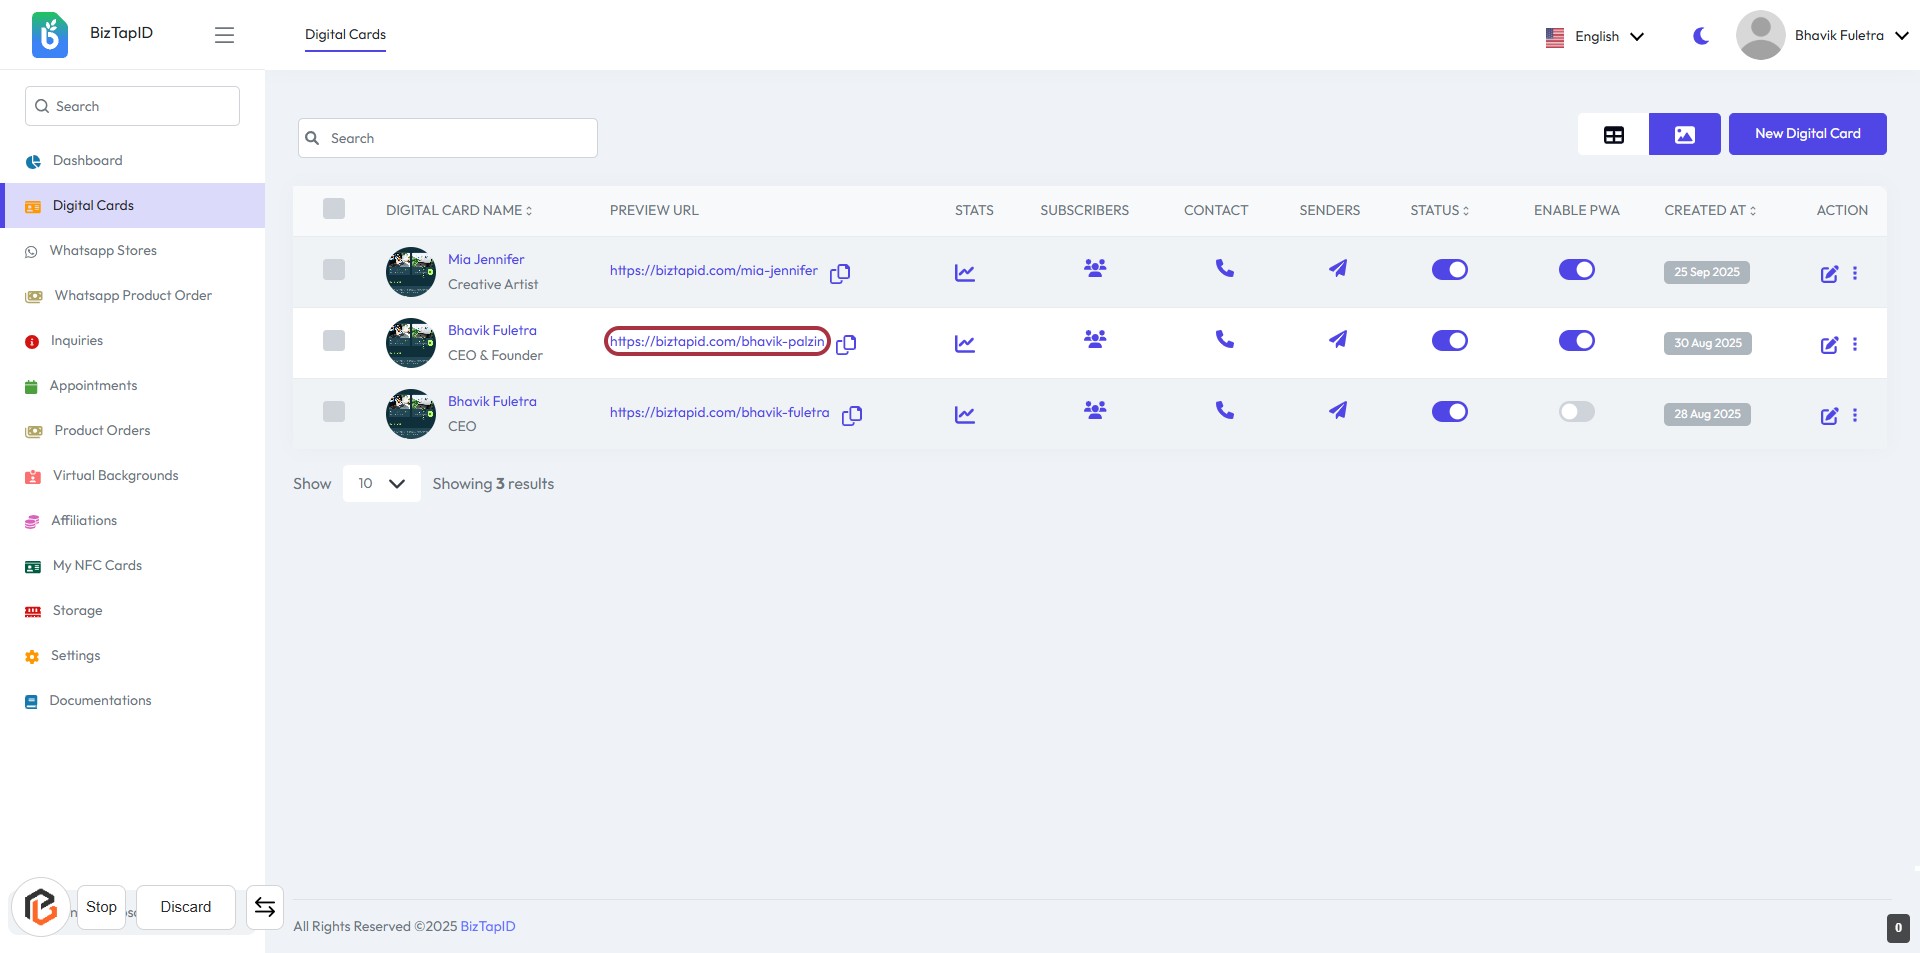
STEP 1: Click on the Preview URL for Bhavik Fuletra
- Navigate to the Digital Cards section on the BizTapID dashboard.
- Locate the entry for Bhavik Fuletra.
- Click on the highlighted Preview URL:
https://biztapid.com/bhavik-palzin. - This action will open the preview of the digital card for further review.
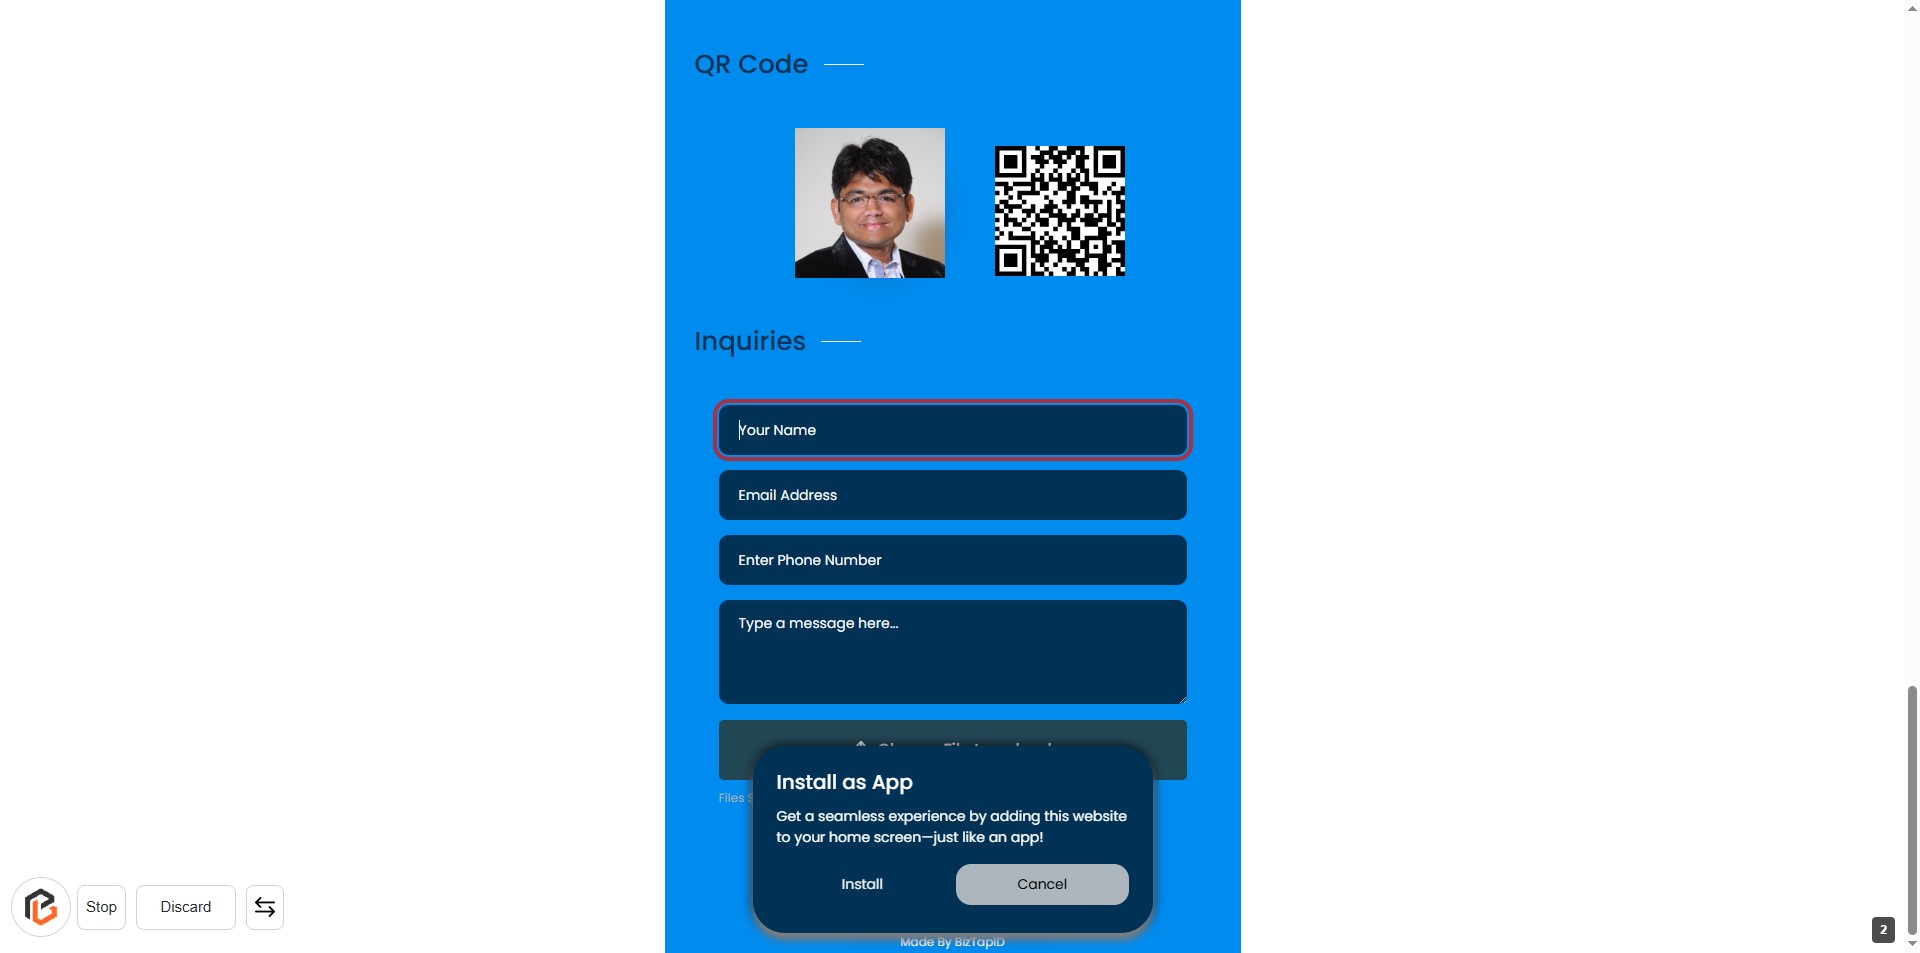
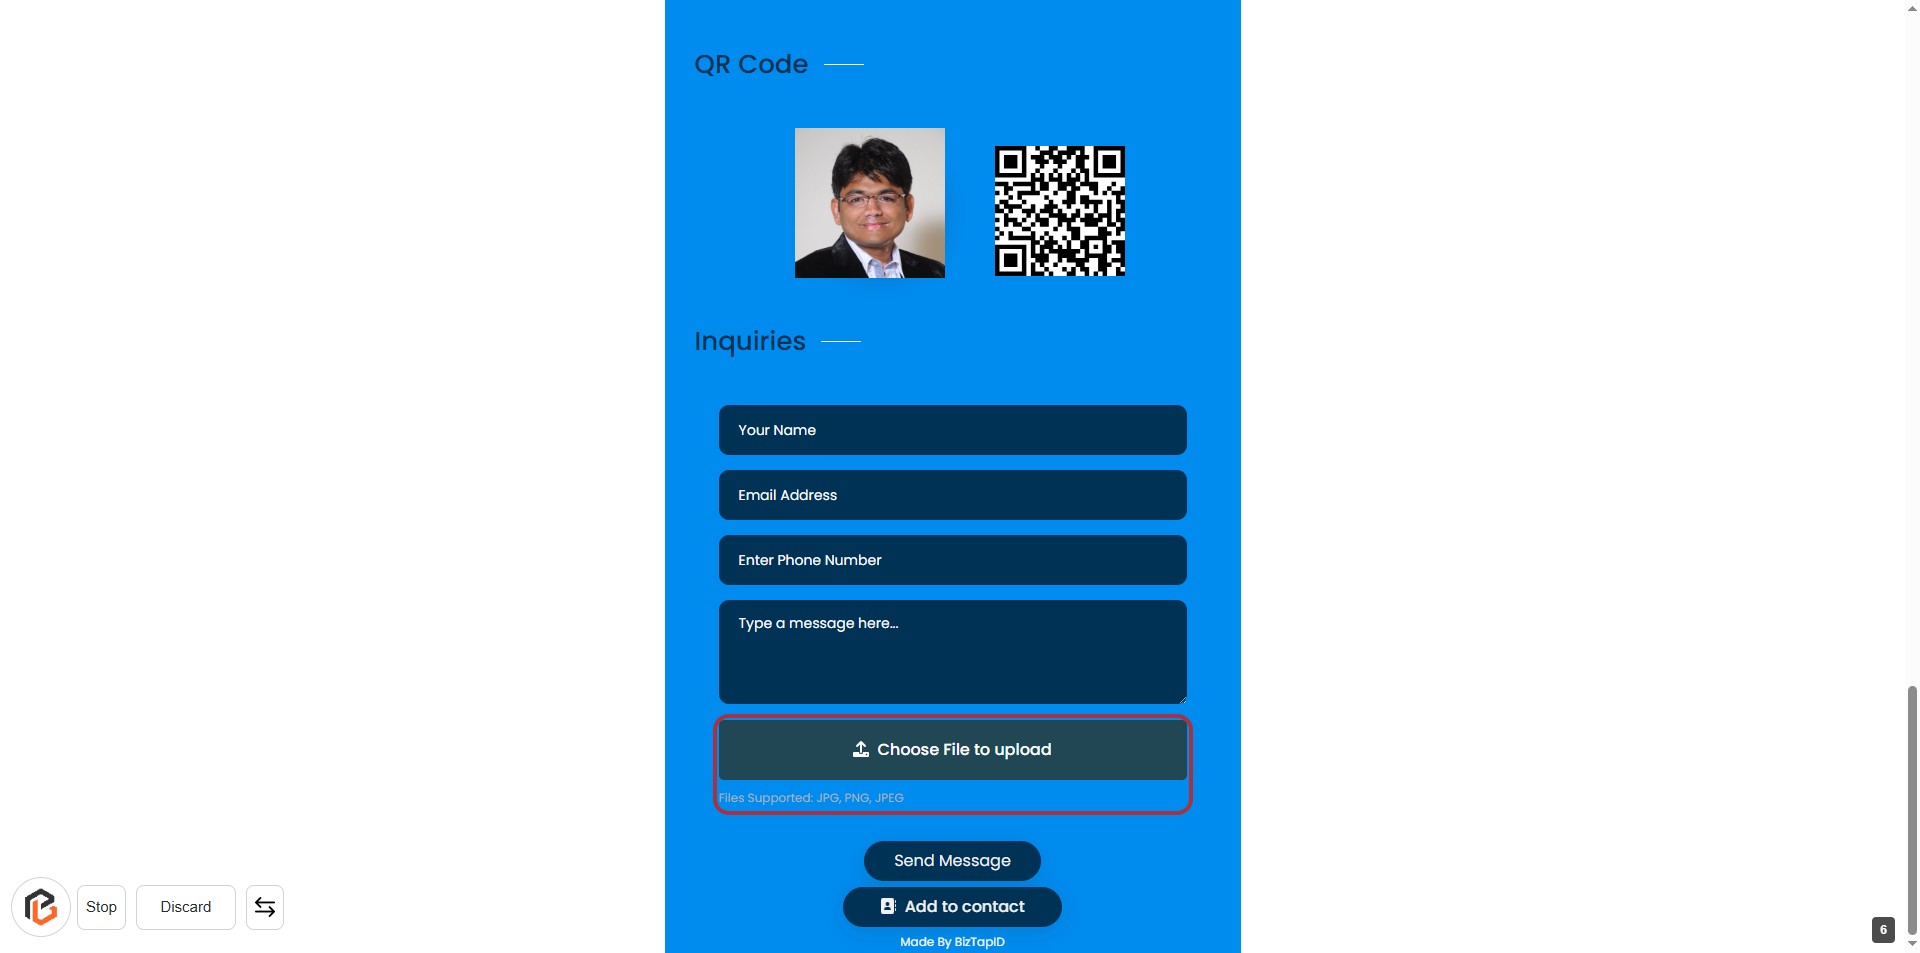
STEP 2: Click on "Inquiries"
- Locate the "Inquiries" section on the form.
- Click on the highlighted area to initiate your inquiry.
- Ensure you have the following fields ready to fill:
- Your Name (required)
- Email Address (required)
- Enter Phone Number (optional)
- Type a message here... (required)

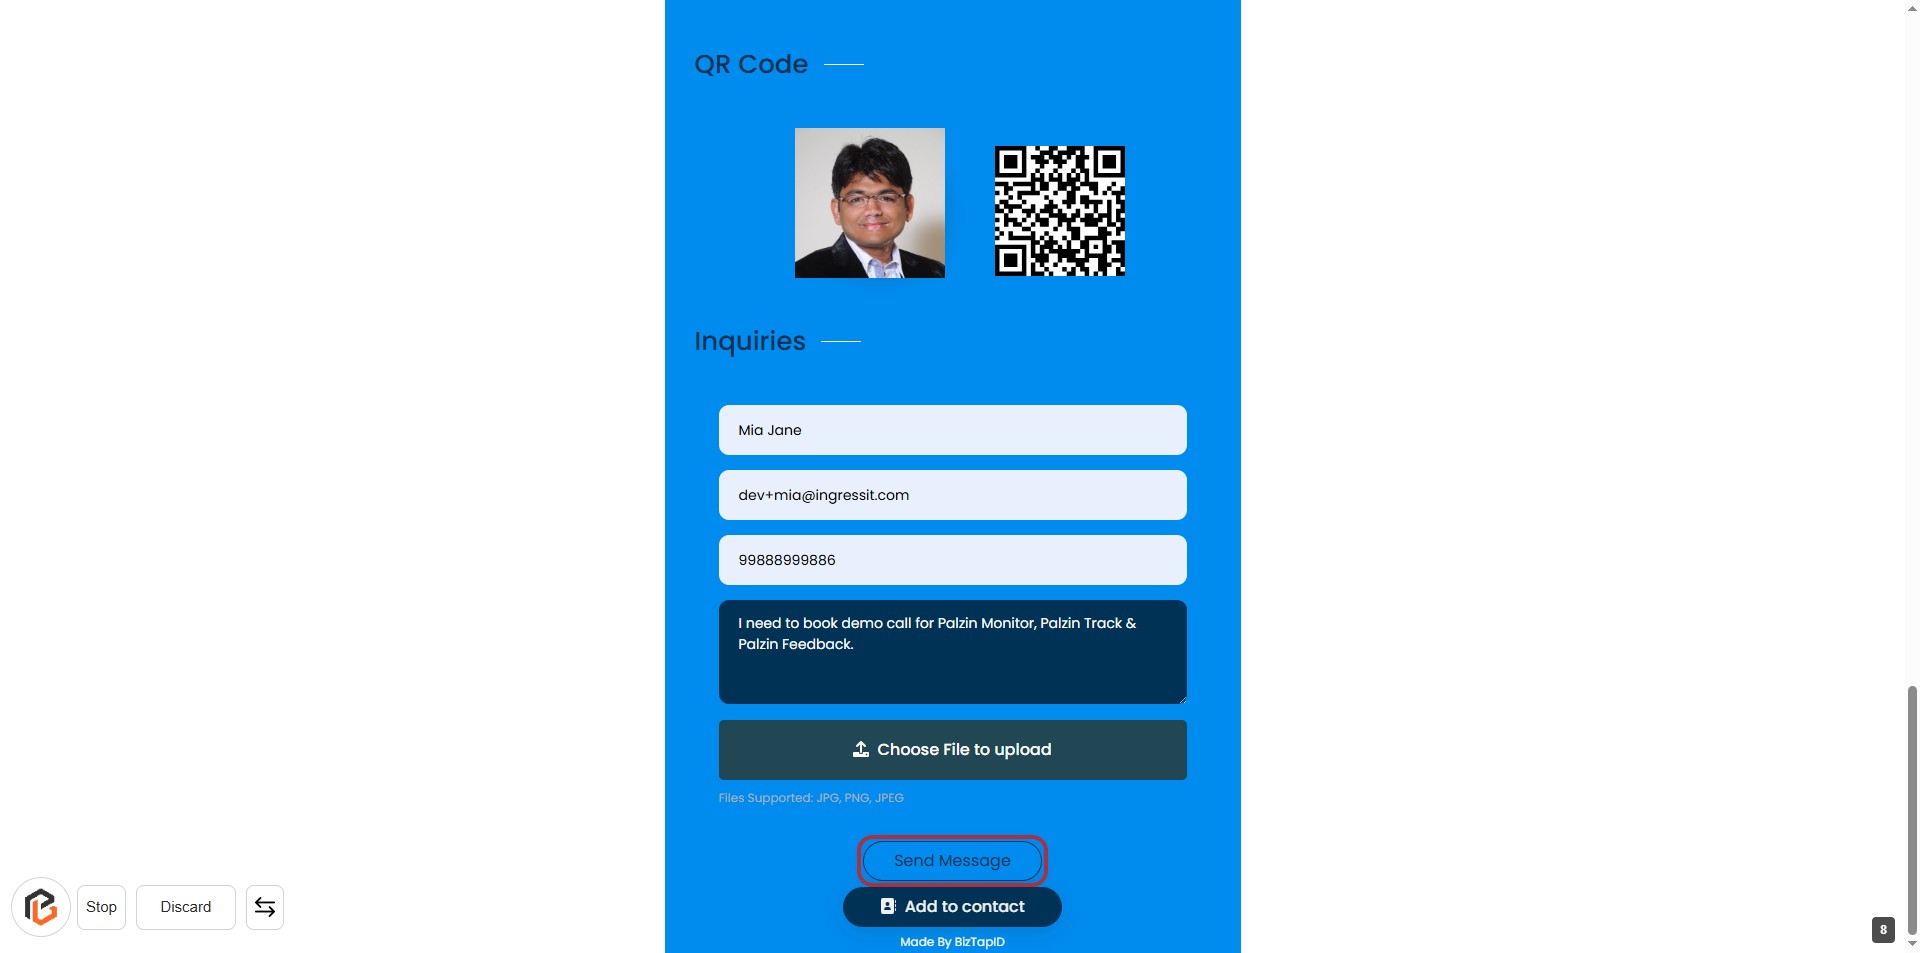
STEP 3: Enter "Your Name"
- Click on the input field labeled "Your Name."
- Type your name in the provided space.
- Ensure that the field is filled out as it may be required for submission (indicated by the absence of an asterisk).
- Proceed to the next step by entering your email address.
STEP 4: Enter "Email Address"
- Click on the "Email Address" input field.
- Ensure the field is active for text entry.
- Enter your email address in the provided space.
- Verify the format of your email address for accuracy.
- Proceed to the next step by entering your phone number.

STEP 5: Enter Phone Number
- Click on the "Enter Phone Number" input field.
- Ensure the field is highlighted and ready for input.
- Enter your phone number as required.
- Verify that the field is correctly filled before proceeding to the next step.

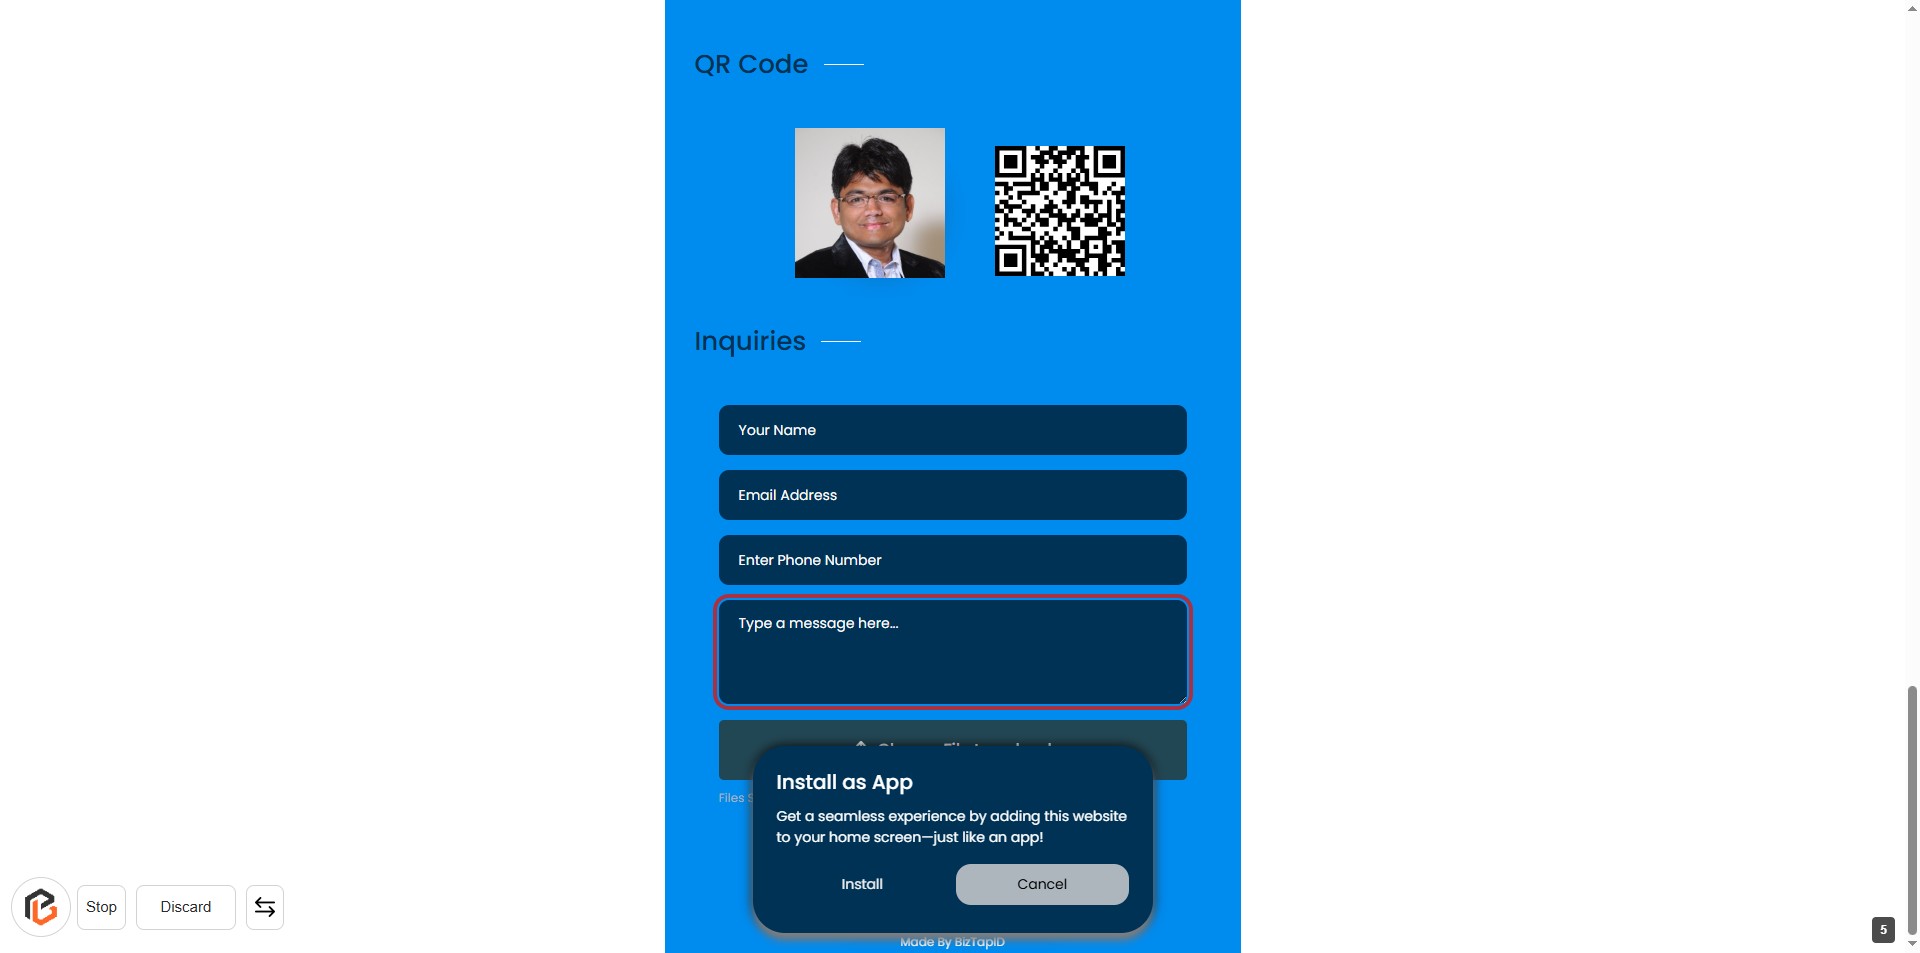
STEP 6: Click to Write Your Message
- Click on the "Type a message here..." textarea to begin entering your message.
- Ensure all previous fields (Your Name, Email Address, Phone Number) are filled out.
- This field is essential for providing context to your inquiry.
- After entering your message, proceed to the next step to upload a file if needed.
STEP 7: Upload File if needed
- Click on the Choose File to upload area to initiate the file selection dialog.
- Ensure the file you want to upload is in JPG, PNG, or JPEG format.
- After selecting the file, verify that it appears in the designated area before proceeding.
- Continue to the next step by clicking on the Send Message button.
STEP 8: CLICK on "Send Message" Button
- Ensure all required fields are filled: Name, Email, Phone Number, and Message.
- Review your inquiry for accuracy.
- Click the "Send Message" button to submit your inquiry.
- After submission, you may proceed to the next step by clicking on "Inquiries."
STEP 9: Click on "Inquiries" to Access Inquiry Management
- Click on the "Inquiries" link in the sidebar to view the inquiries dashboard.
- This section displays a list of inquiries associated with digital cards.
- You can manage inquiries, view details, and take necessary actions from this dashboard.
- Ensure to check for any notifications or updates related to inquiries.
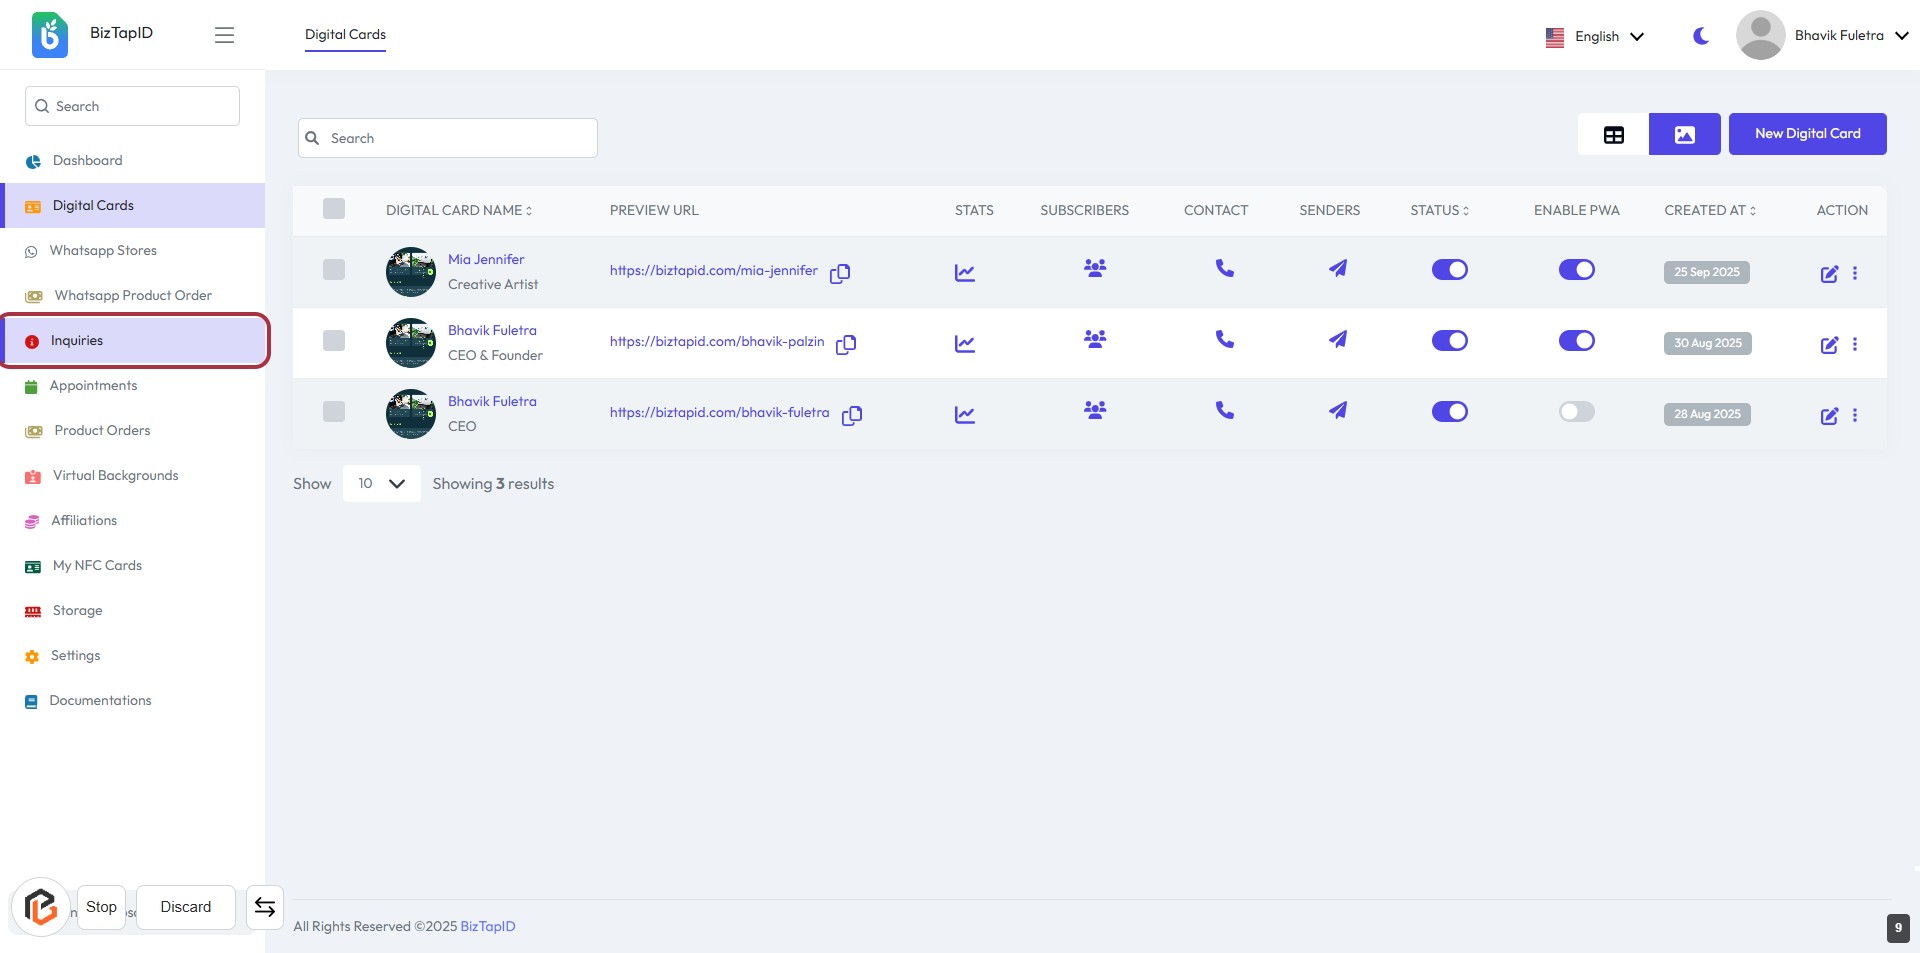
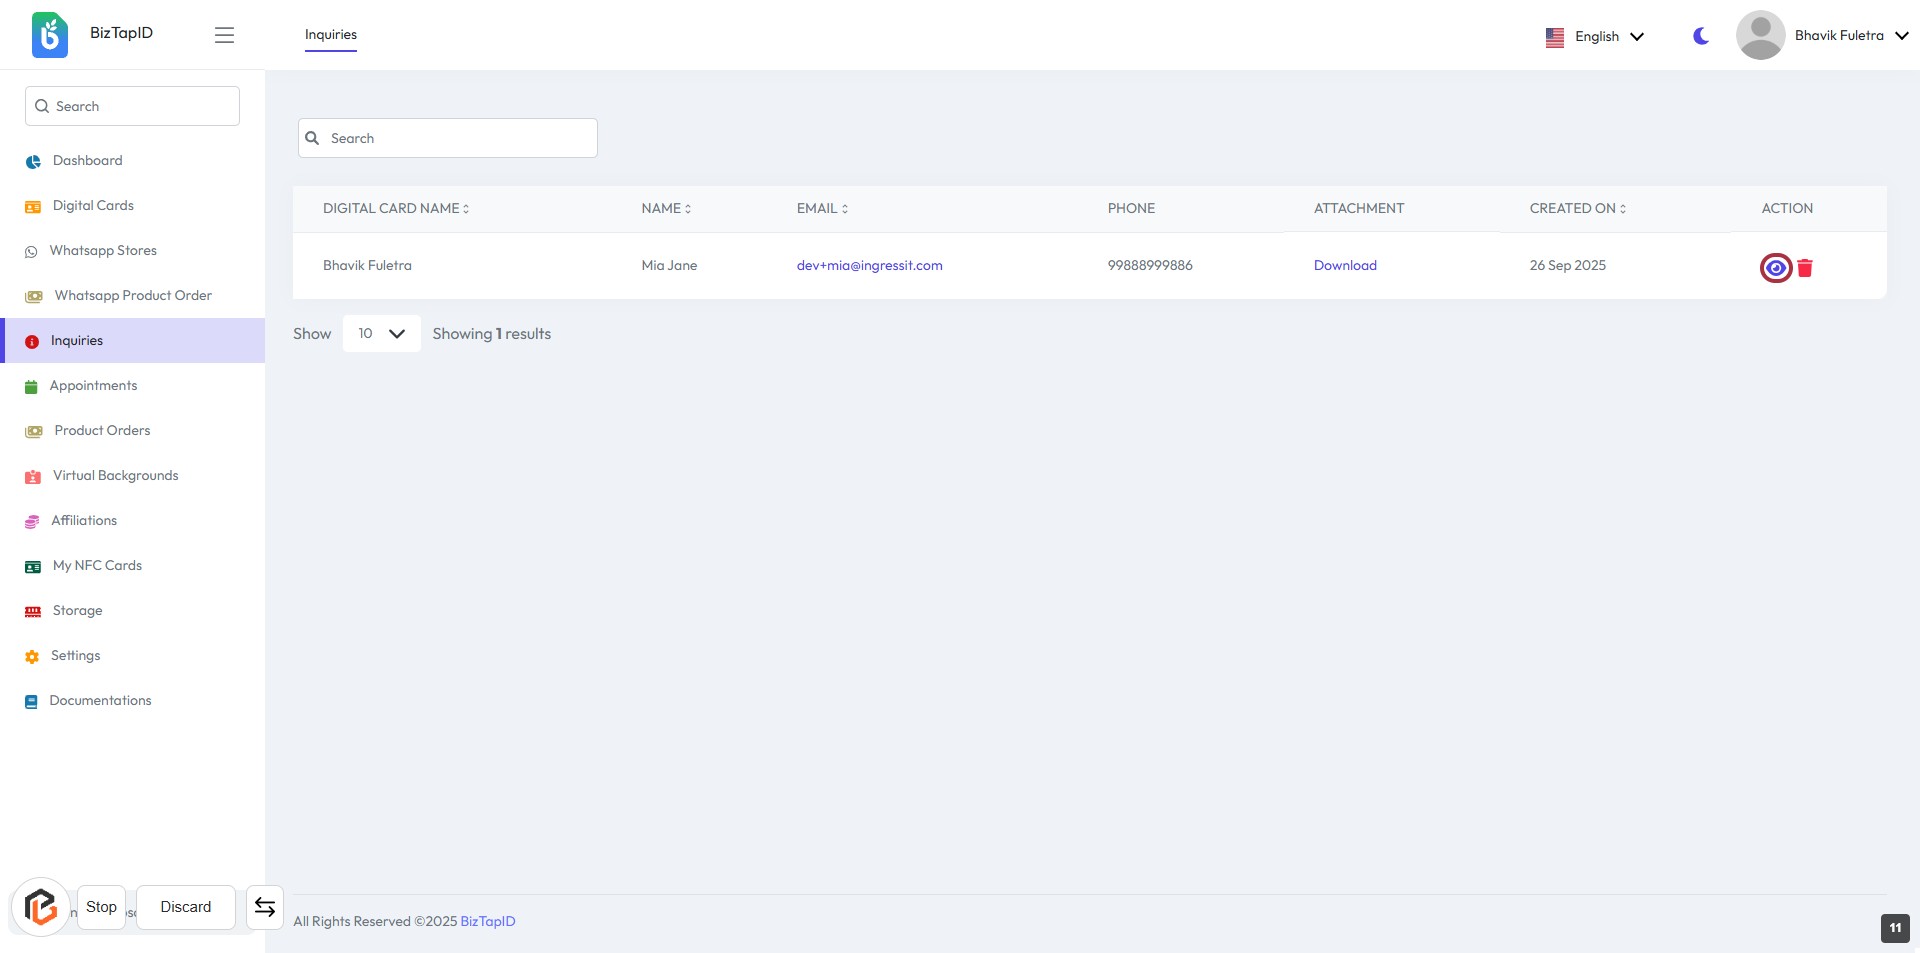
STEP 10: Click on "Inquiries" Dashboard to View Details
- Ensure you are connected to the internet to access the dashboard.
- The dashboard displays a table with the following columns:
- DIGITAL CARD NAME
- NAME
- PHONE
- ATTACHMENT
- CREATED ON
- ACTION
- You can adjust the number of results displayed using the "Show" dropdown.
- Click on the "View" icon in the "ACTION" column to see more details about a specific inquiry.
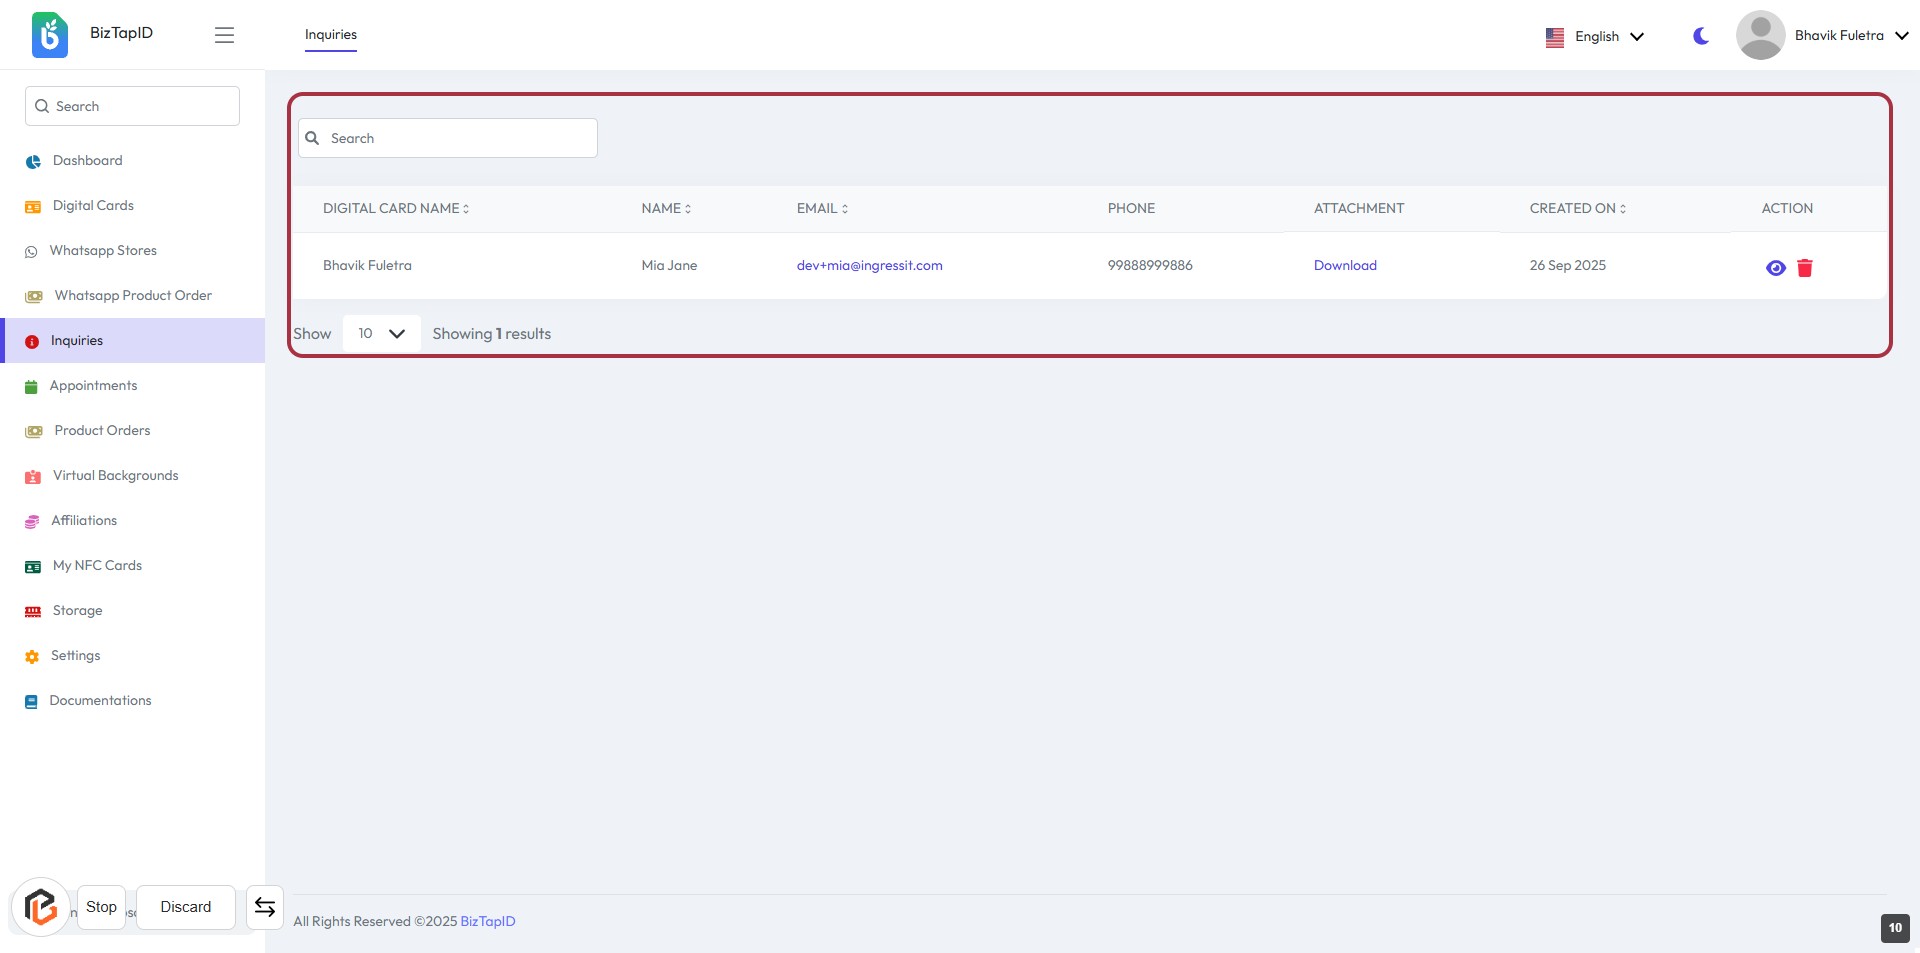
STEP 11: Click on "View" Icon to Access Inquiry Details
- Navigate to the "Inquiries" section.
- Locate the "View" icon in the action column of the inquiry table.
- Click on the icon to open the details of the selected inquiry.
- Ensure you have the necessary permissions to view the details.
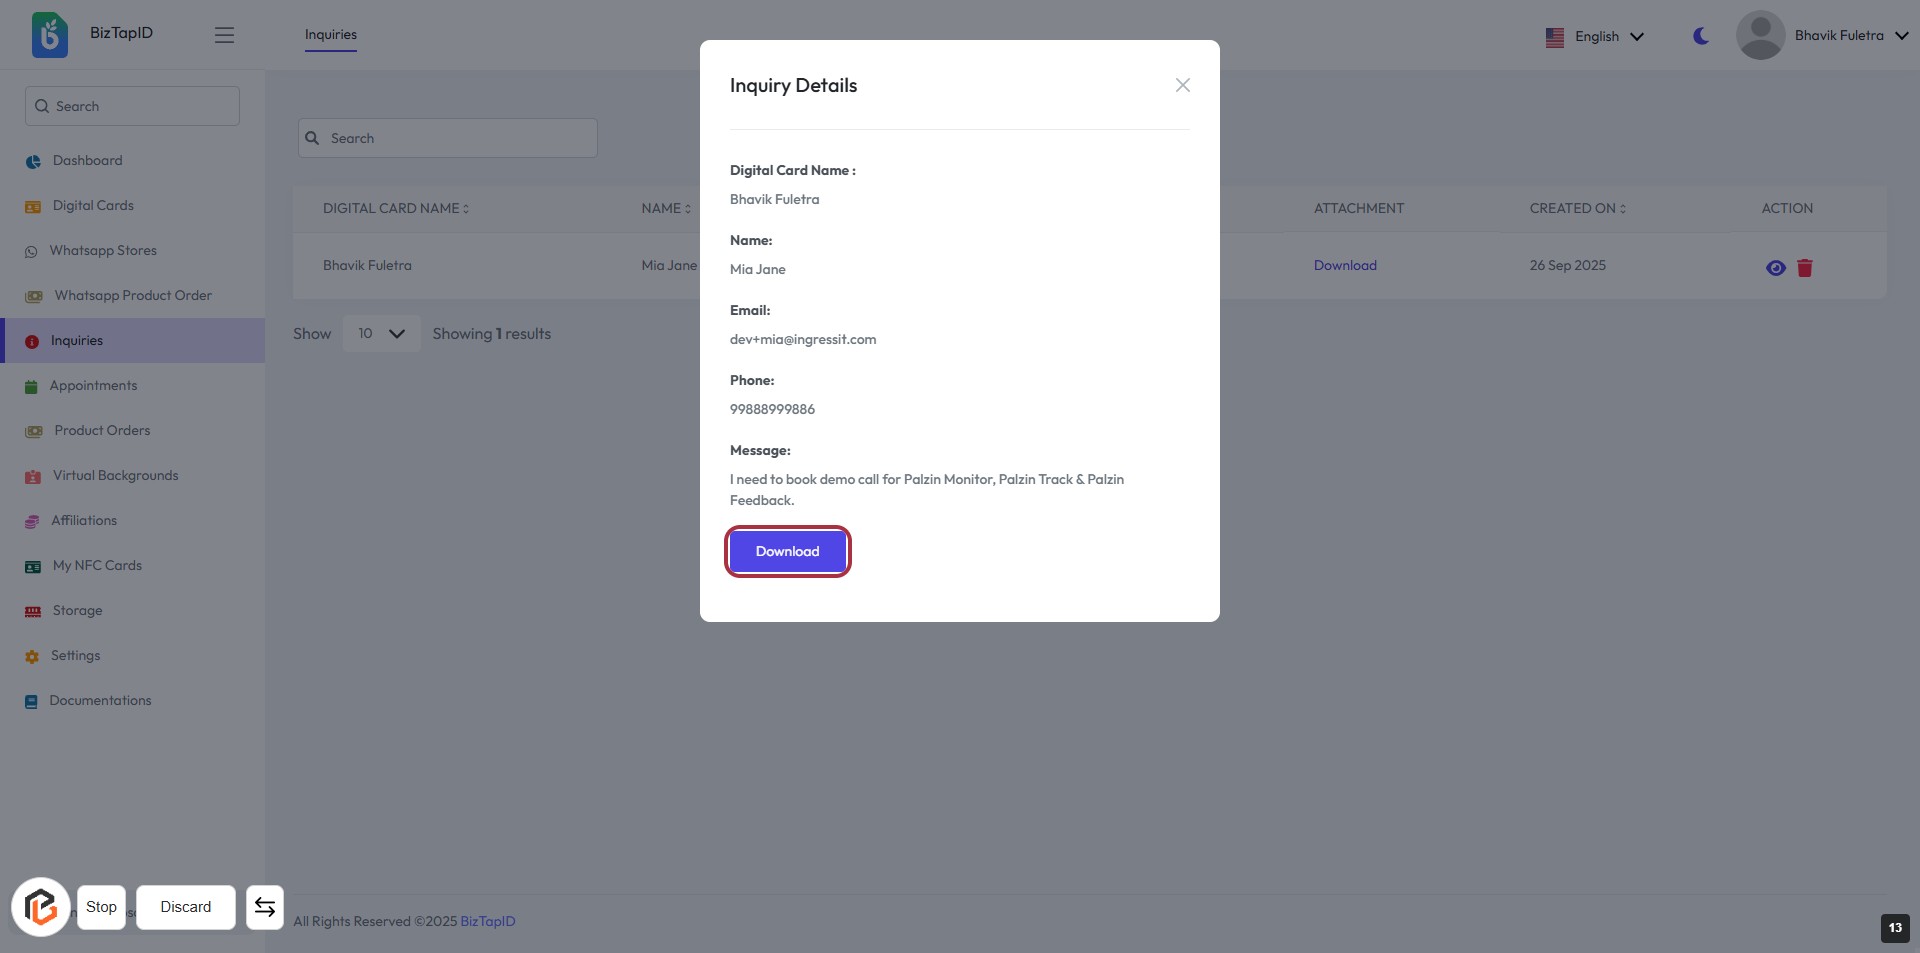
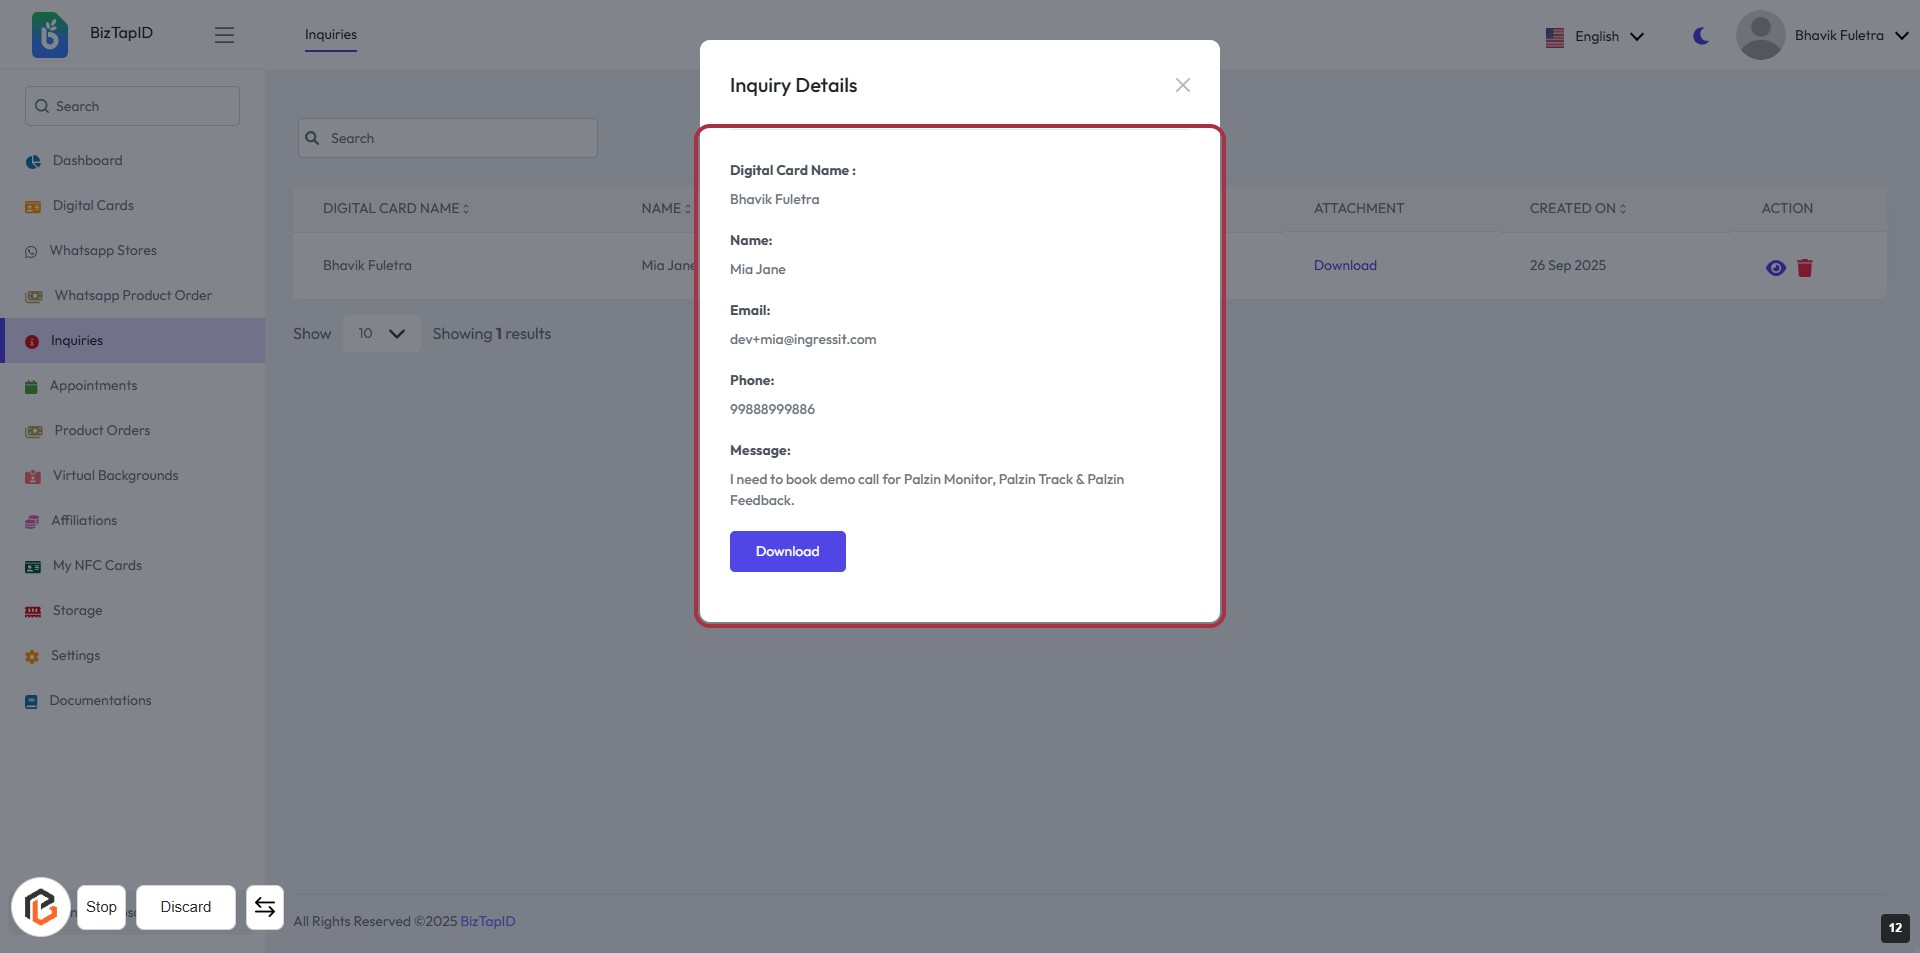
STEP 12: View Inquiry Details
- Click on the highlighted area to view the "Inquiry Details" dialog.
- Review the following information:
- Digital Card Name: Displays the name associated with the inquiry.
- Name: The name of the person who made the inquiry.
- Email: Contact email for follow-up.
- Phone: Phone number provided.
- Message: Inquiry details or requests.
- If needed, proceed to click the "Download" button for any attachments.
STEP 13: Click on "Download" Button to Retrieve Inquiry Details
- Locate the "Download" button highlighted in the inquiry details dialog.
- Click on the "Download" button to initiate the download of the inquiry attachment.
- Ensure that you have the necessary permissions to download files from this interface.