How to Customize Font Settings for Your Digital Cards: A Step-by-Step Guide
4 mins read · Updated 01 Oct, 2025
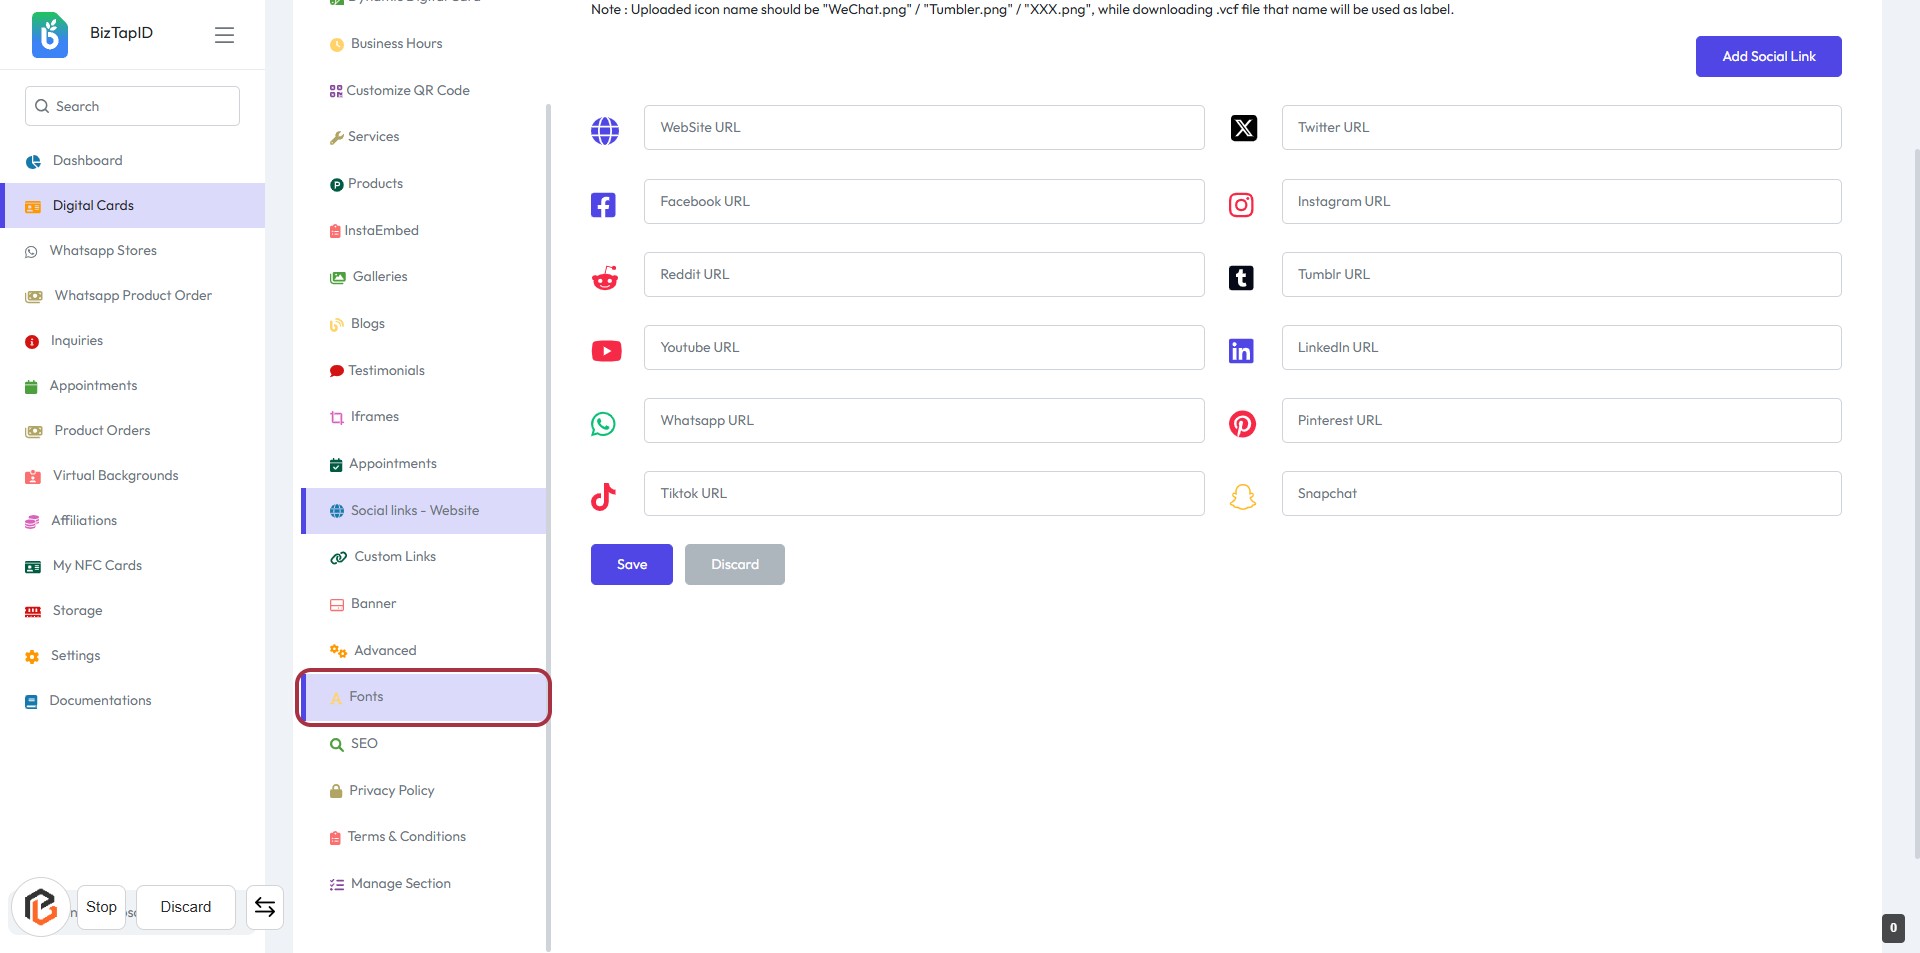
STEP 1: Click on "Fonts" to Access Font Settings
- Navigate to the "Fonts" section in the sidebar.
- This section allows you to manage font settings for your digital cards.
- Ensure you review any instructions or notes provided at the top of the page.
- After this, proceed to select the "Font Family" in the next step.
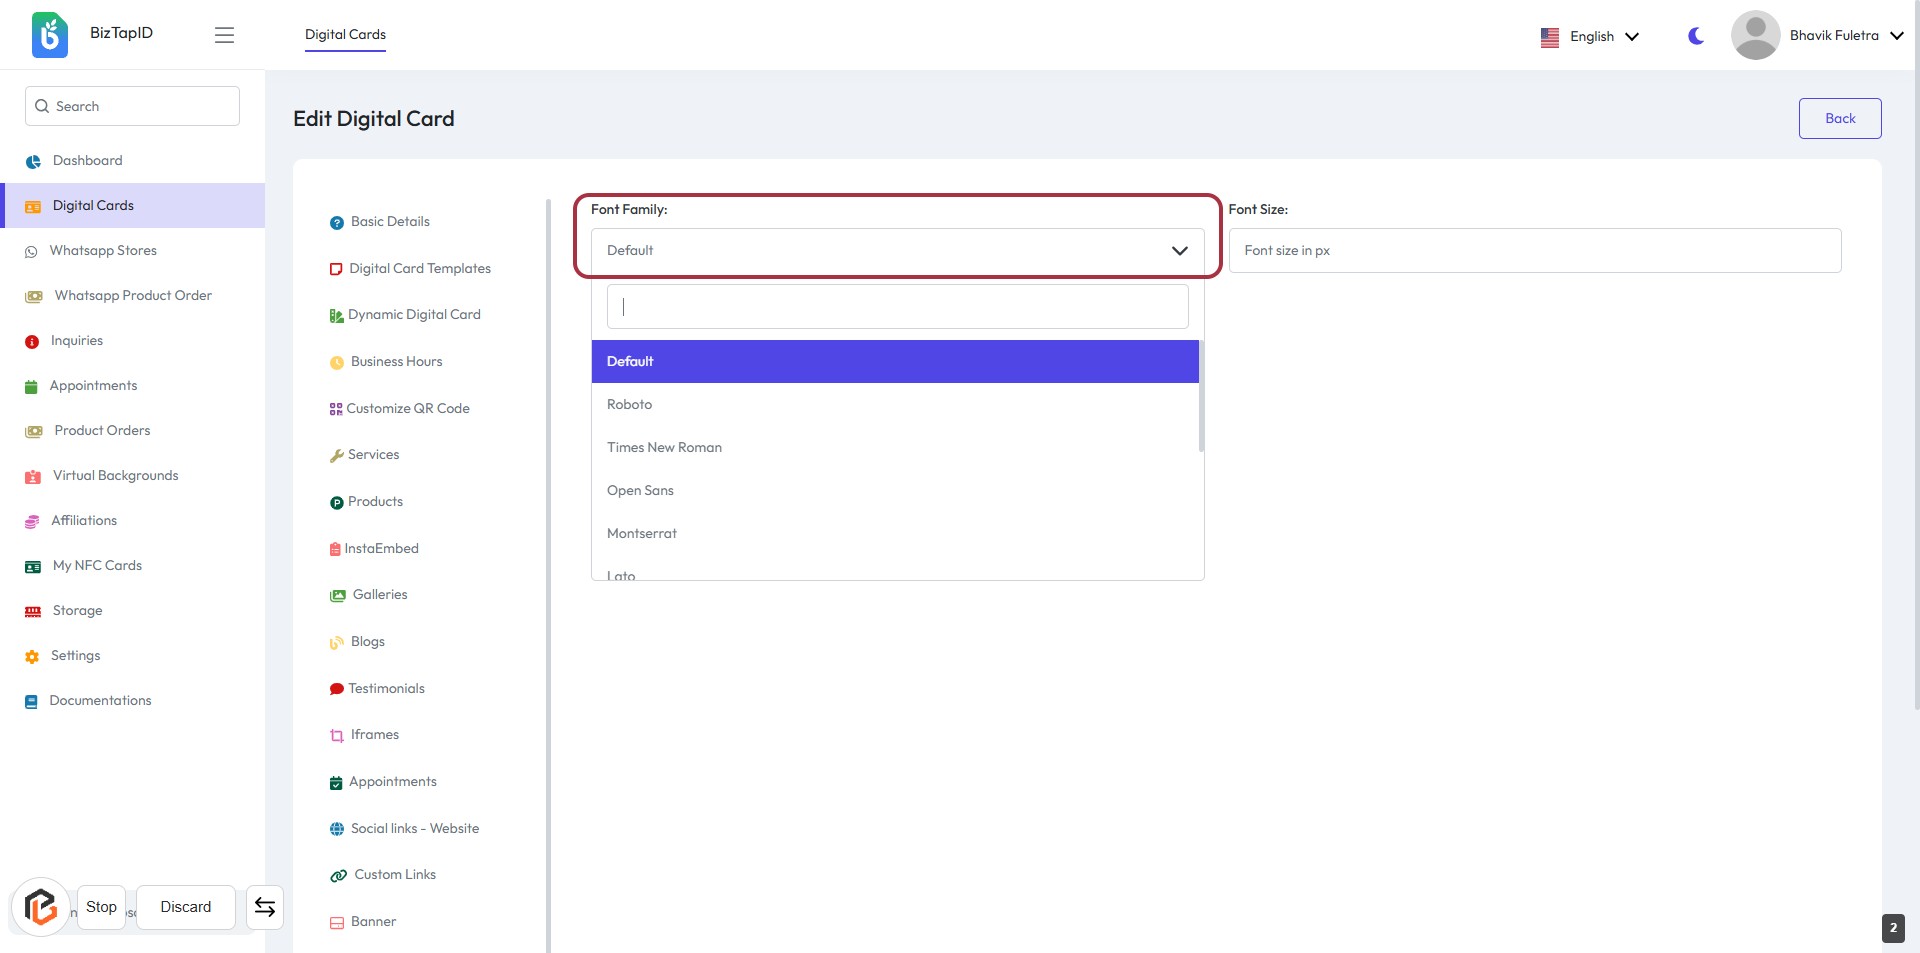
STEP 2: Select "Font Family"
- Click on the "Font Family" dropdown menu.
- Choose from the available options: Roboto, Times New Roman, Open Sans, Montserrat, Lato, etc.
- Ensure to select your preferred font for the digital card.
- Proceed to the next step to enter the "Font Size."
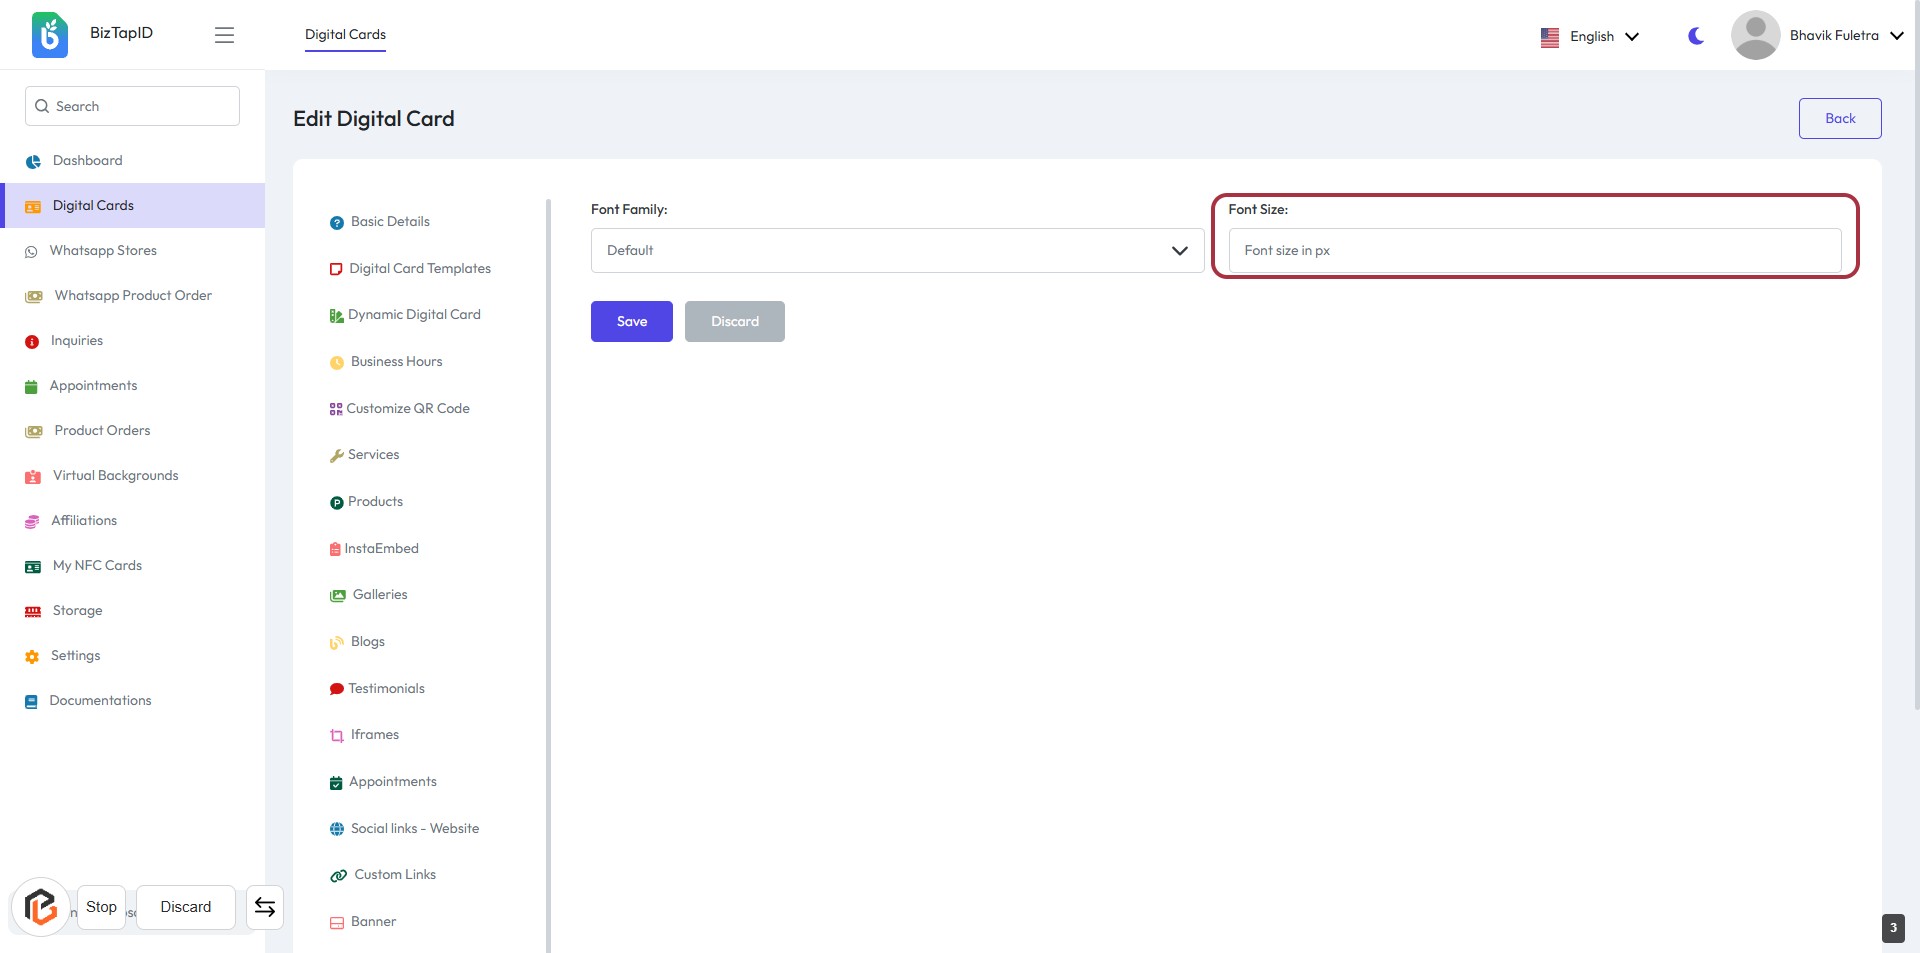
STEP 3: Enter "Font Size"
- Click on the "Font Size:" field to input your desired font size.
- Enter the size in pixels (px) as required.
- Ensure the value is appropriate for your design.
- After entering the font size, proceed to the next step by clicking the "Save" button.
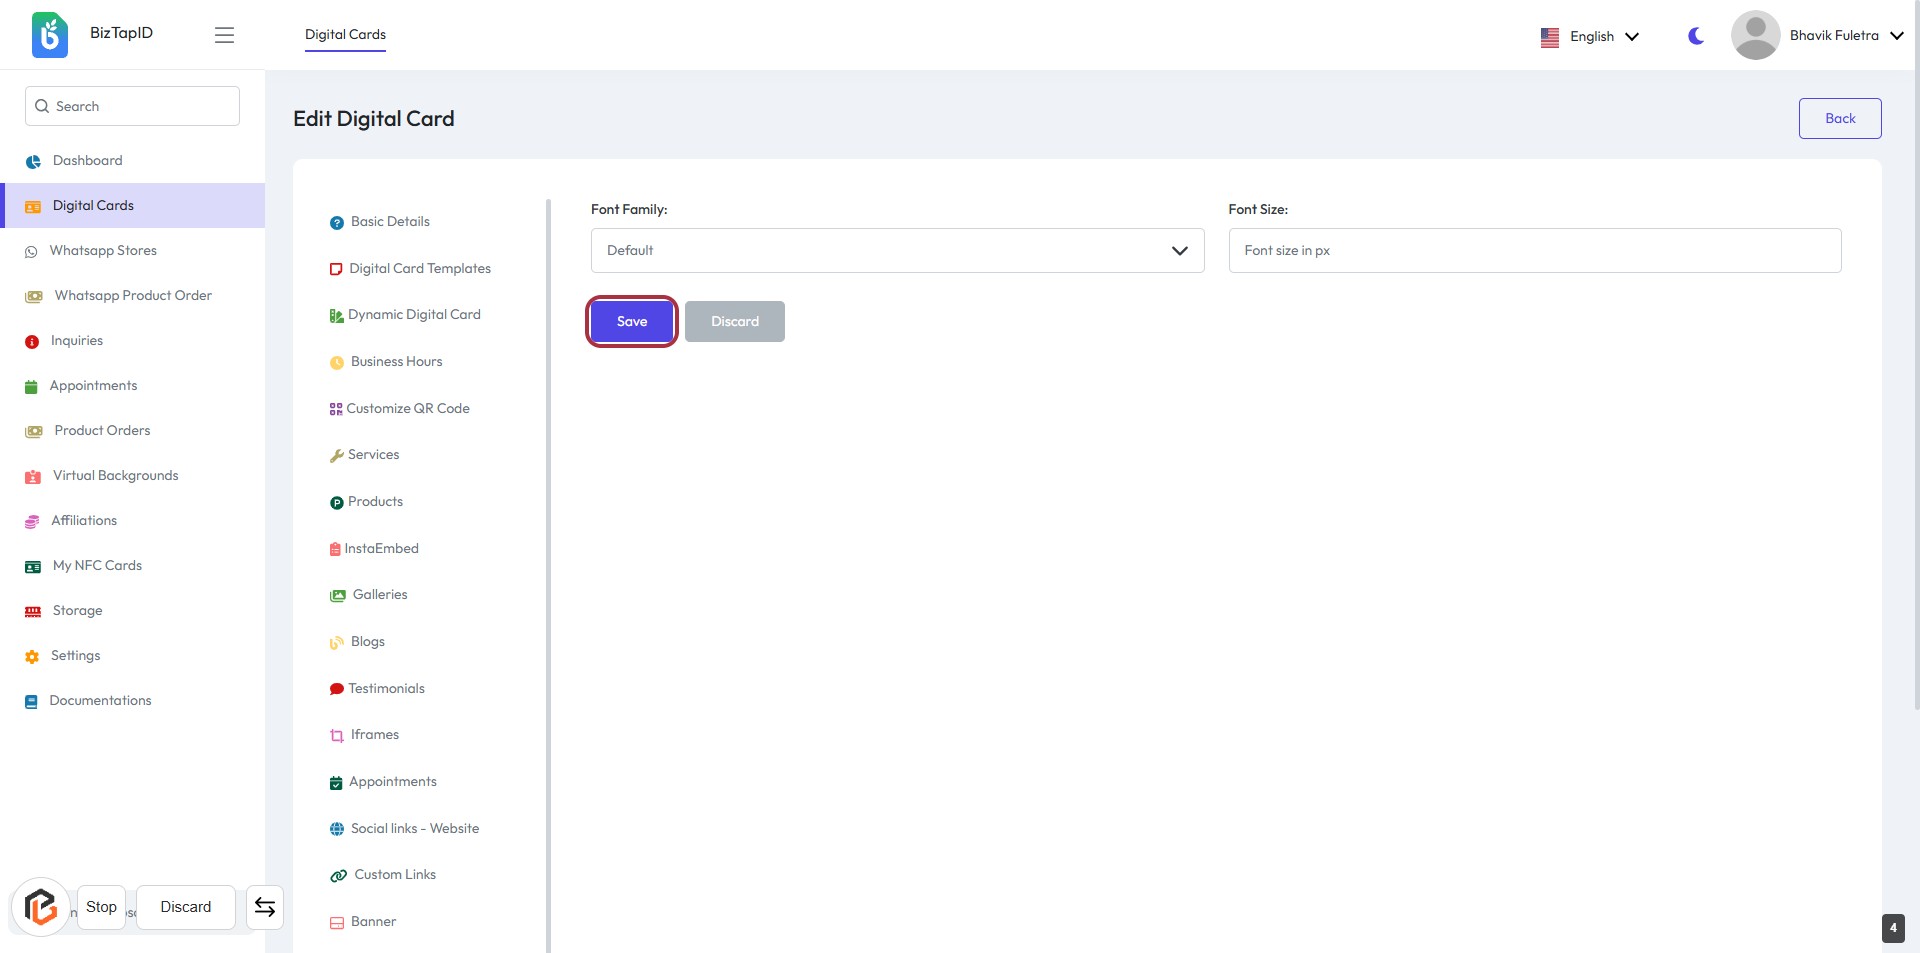
STEP 4: Click on "Save" Button to Confirm Changes
- Ensure all required fields are filled, including "Font Family" and "Font Size."
- Locate the "Save" button highlighted in blue on the right side of the form.
- Click the "Save" button to confirm your changes.
- Review any confirmation messages that appear after saving.