Comprehensive Guide to Configuring Your Digital Card Settings: Required Fields, Toggle Options, and Finalizing Changes
11 mins read · Updated 01 Oct, 2025
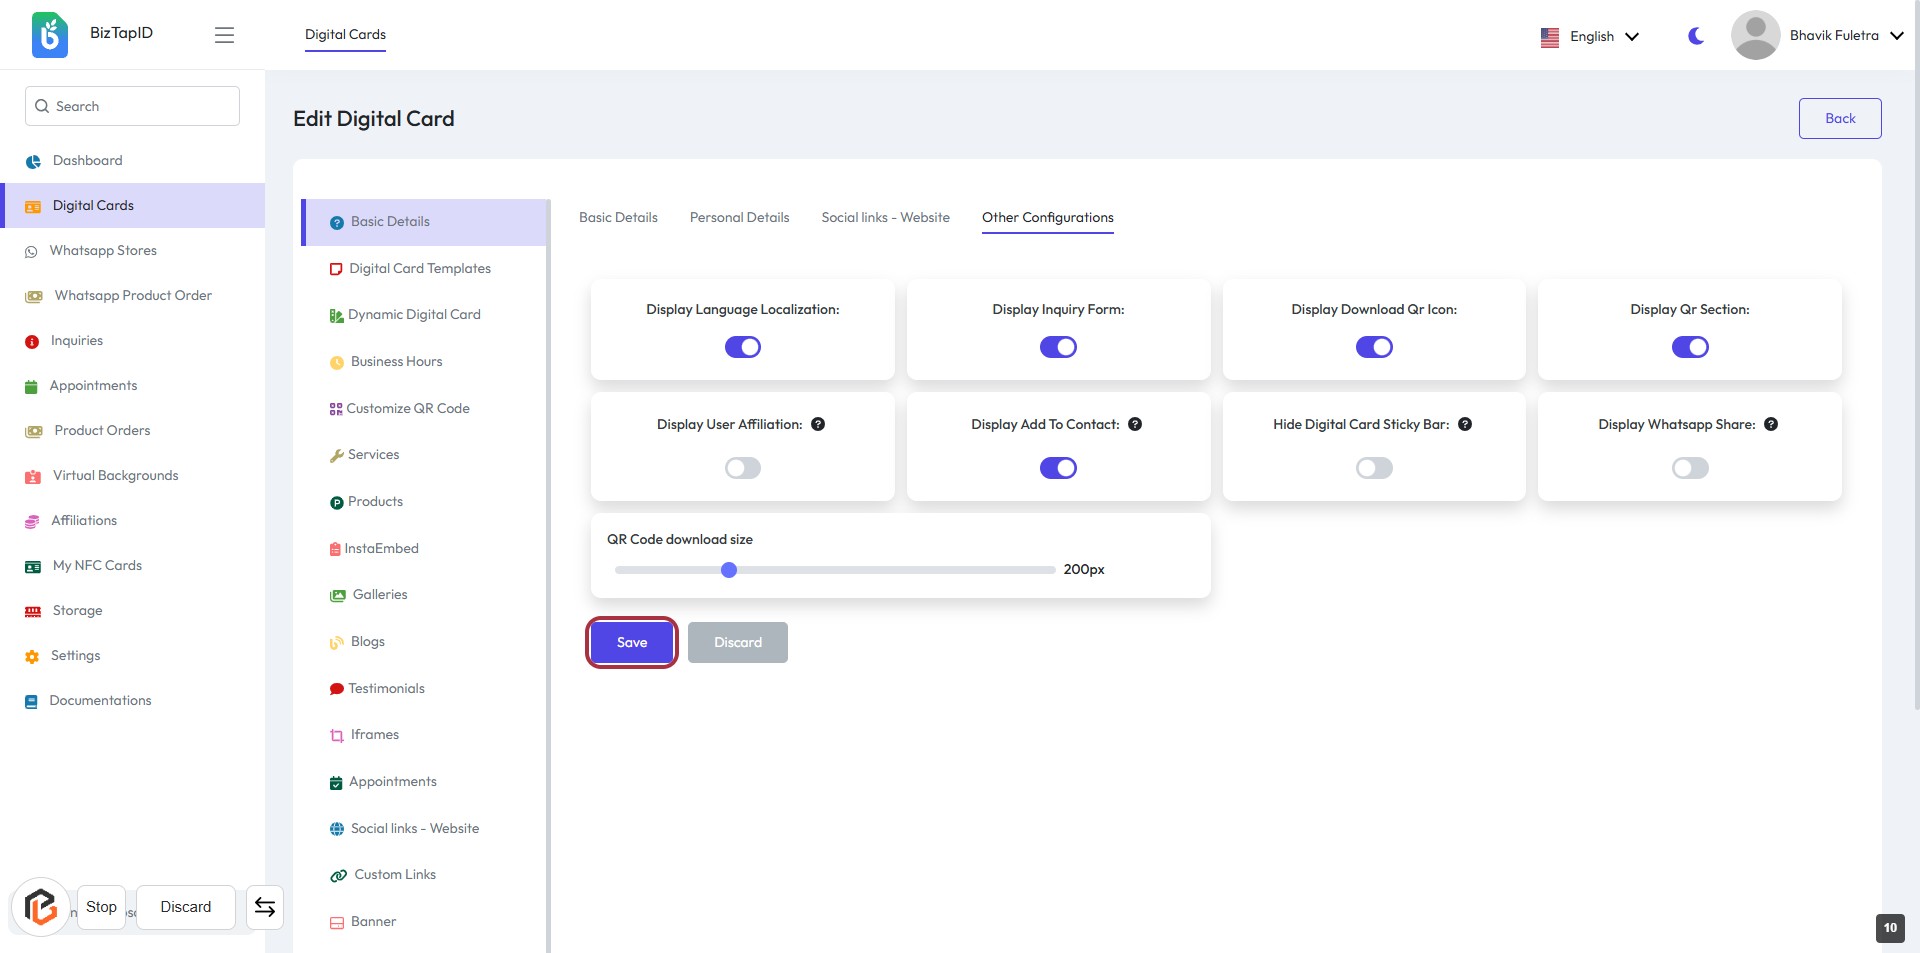
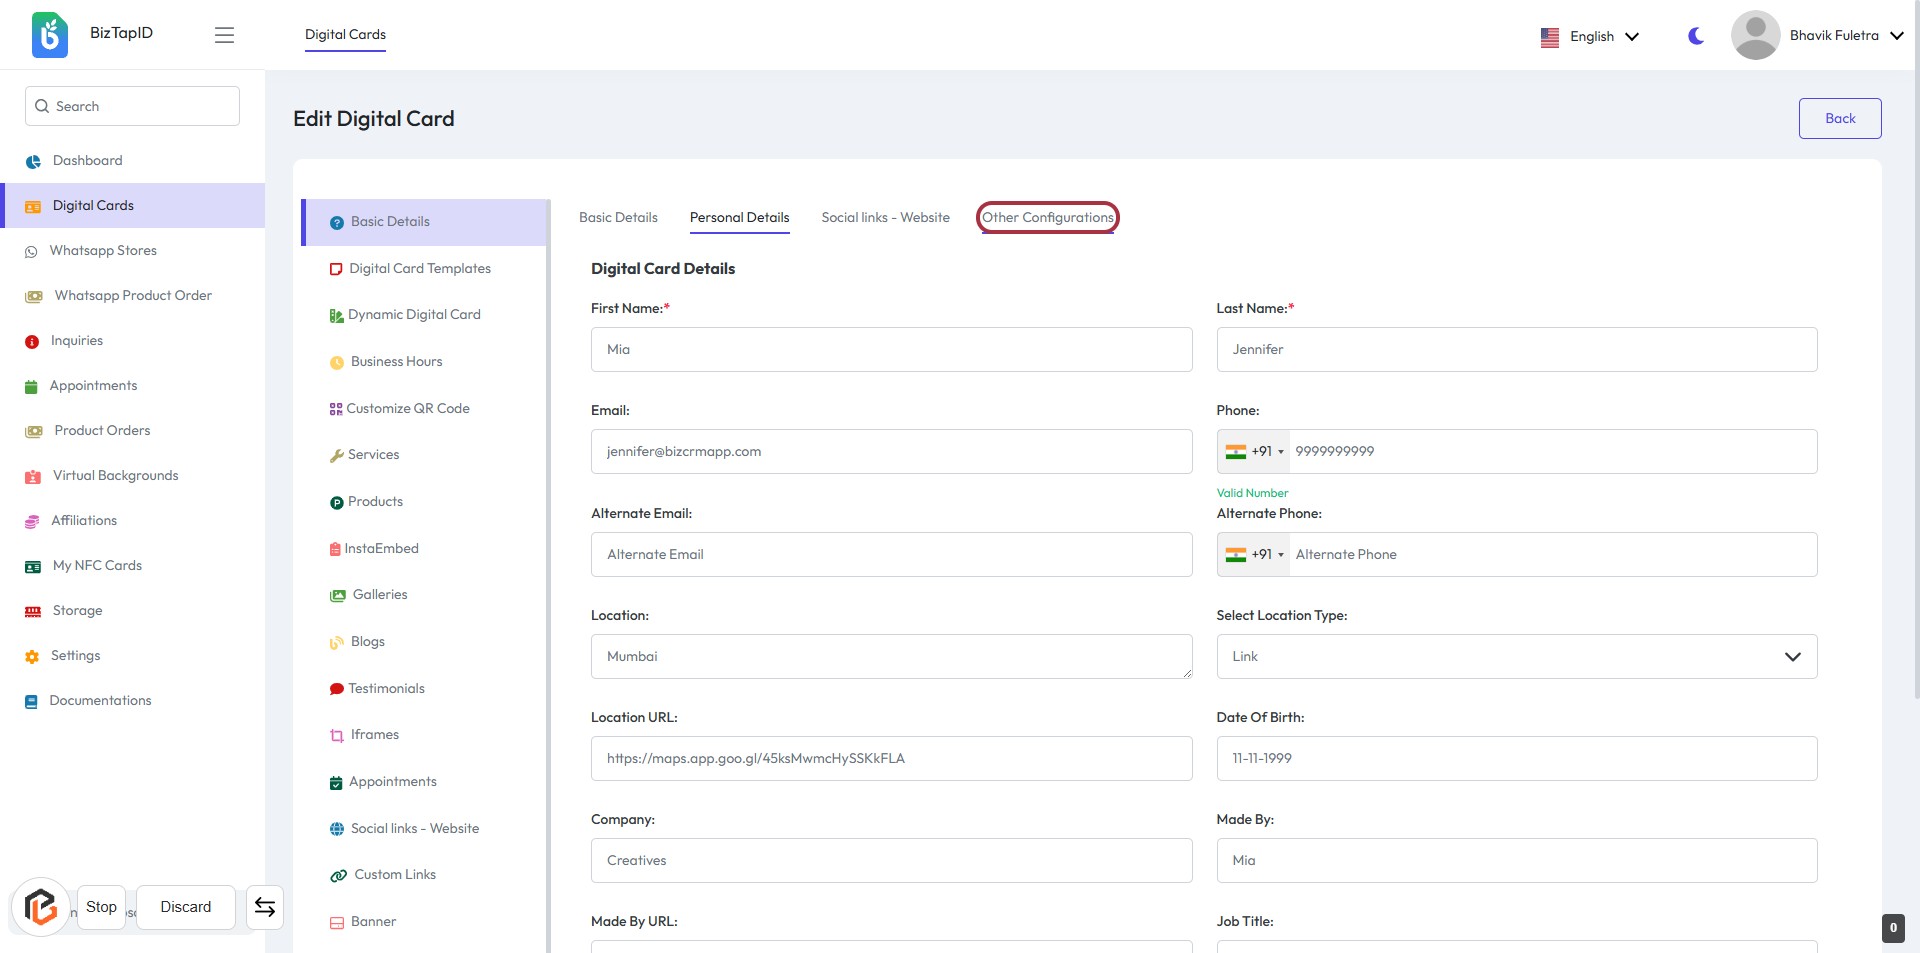
STEP 1: Click on "Other Configurations" to Access Additional Settings
- Navigate to the "Other Configurations" section in the Digital Card settings.
- Review the available fields:
- First Name: Required
- Last Name: Required
- Email: Required
- Alternate Email: Optional
- Phone: Required
- Alternate Phone: Optional
- Location: Optional
- Location URL: Optional
- Company: Optional
- Made By: Optional
- Job Title: Optional
- Ensure all required fields marked with an asterisk (*) are filled out before proceeding.
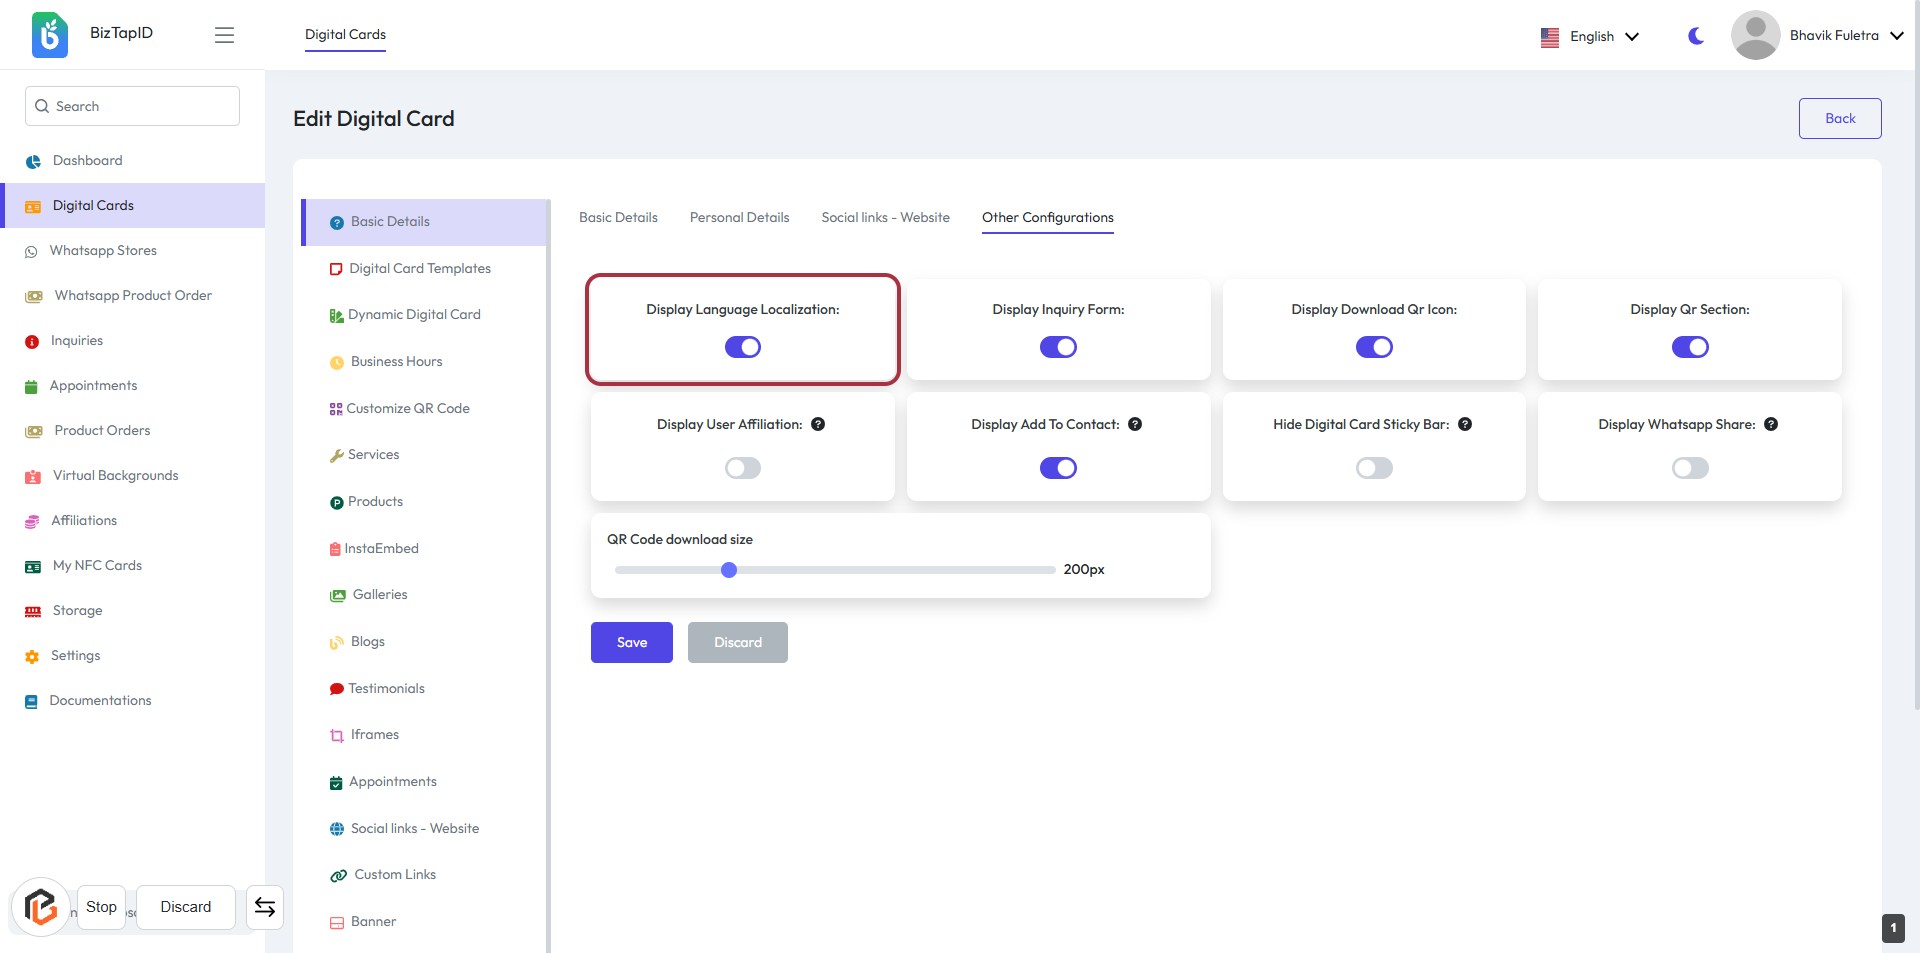
STEP 2: Click to Toggle "Display Language Localization"
- Locate the "Display Language Localization" option in the Other Configurations section.
- Click on the toggle switch to enable or disable the display of language localization.
- Ensure the toggle reflects your preference before proceeding.
- Review other configuration options if needed.
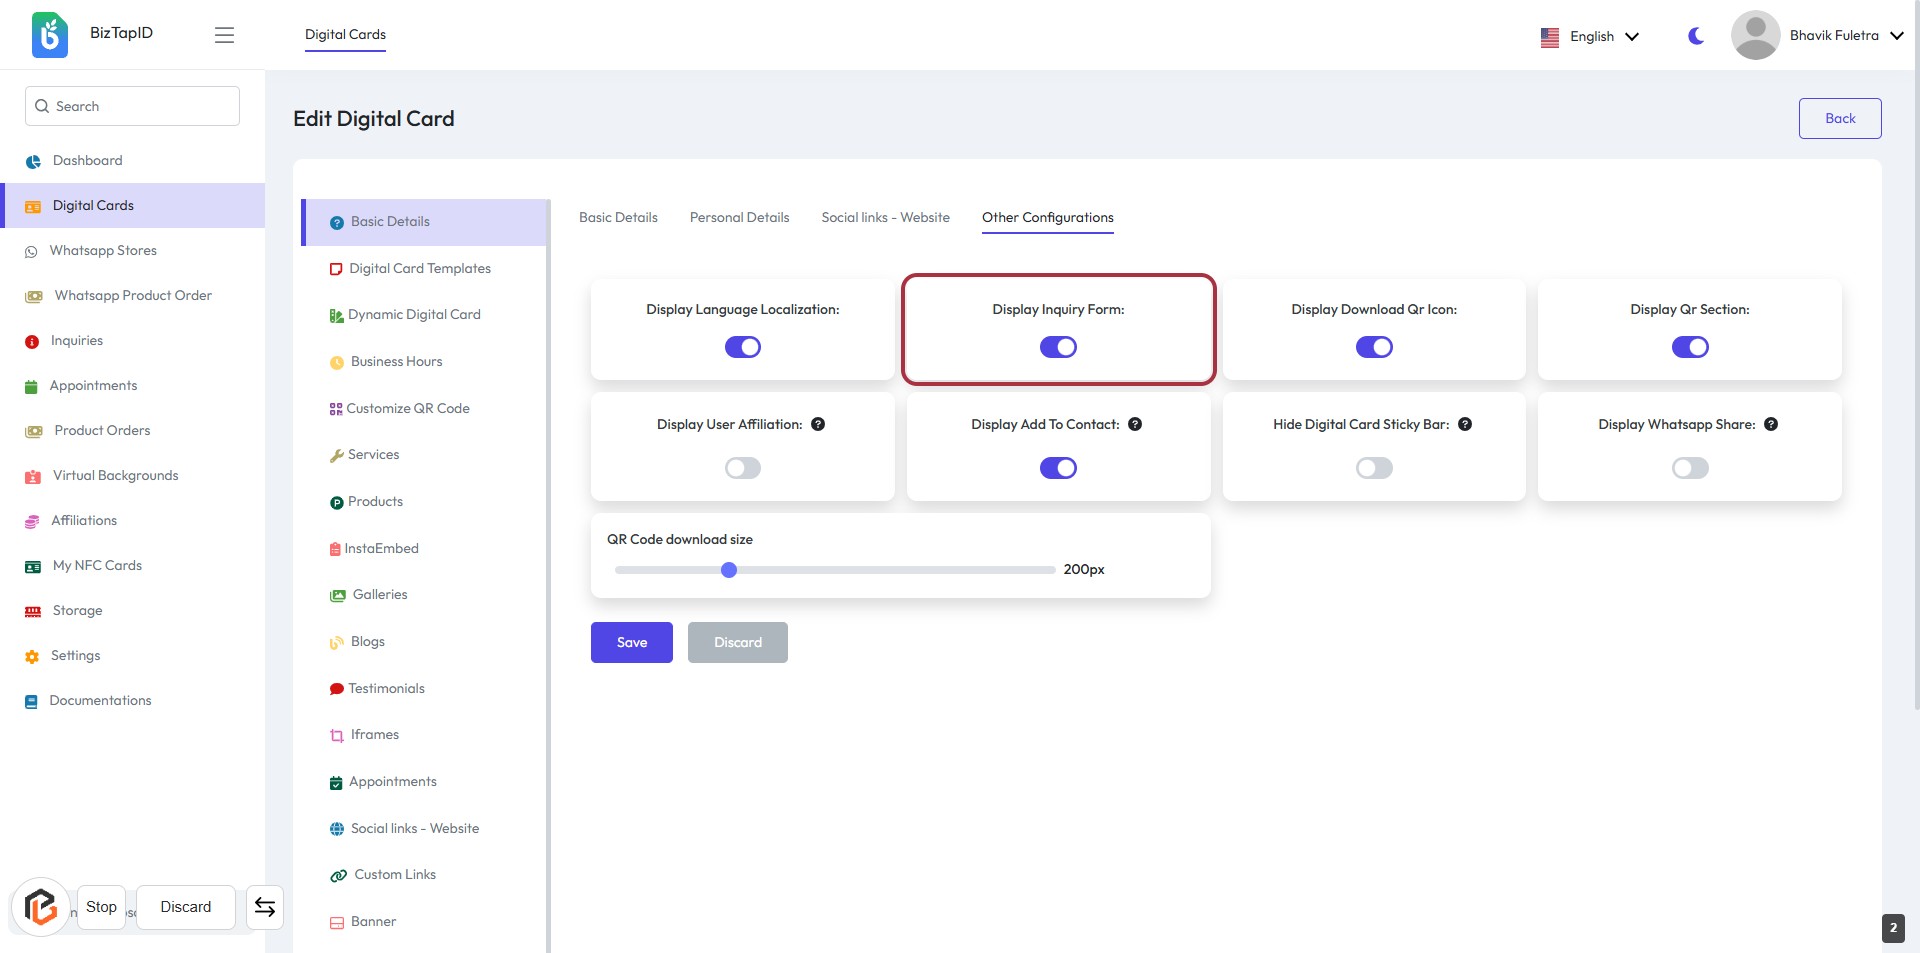
STEP 3: Click to Toggle "Display Inquiry Form"
- Navigate to the "Other Configurations" section.
- Locate the "Display Inquiry Form" toggle.
- Click on the toggle to enable or disable the display of the inquiry form.
- Ensure the setting reflects your preference before proceeding to the next step.
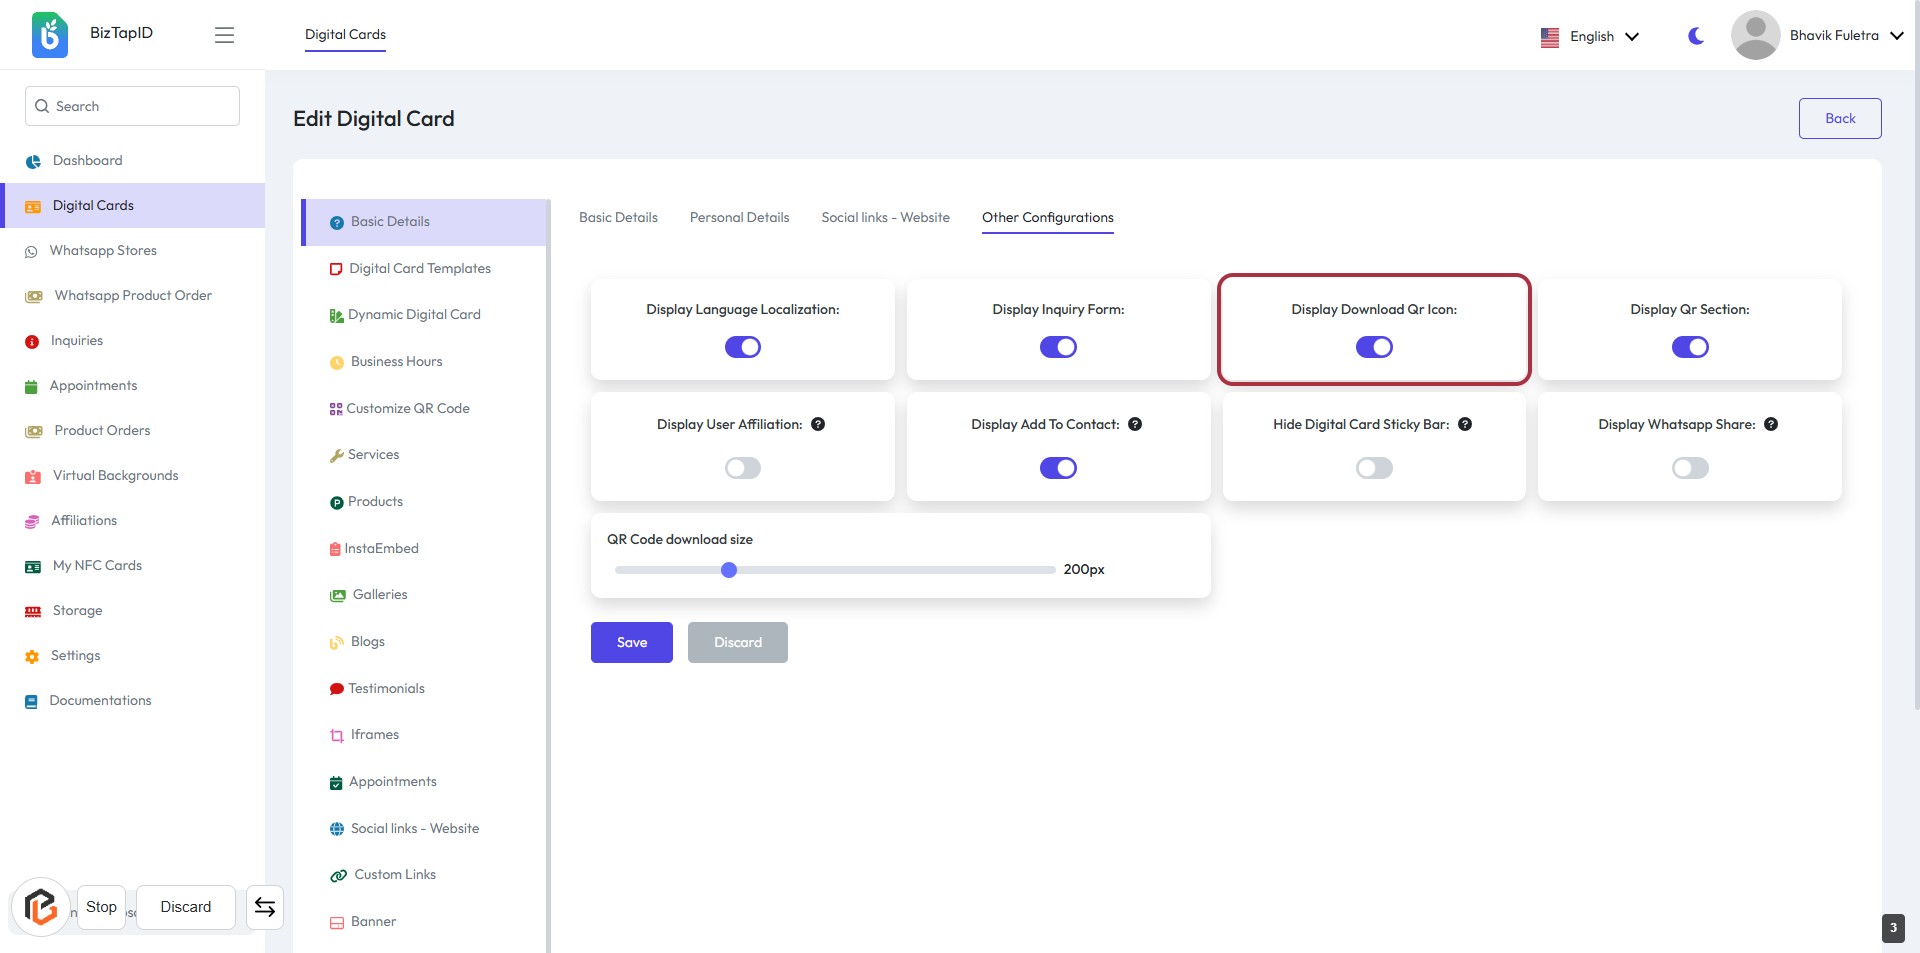
STEP 4: Click to Toggle "Display Download QR Icon"
- Navigate to the "Other Configurations" section.
- Locate the "Display Download QR Icon" toggle.
- Click on the toggle to enable or disable the QR icon display.
- Ensure the toggle reflects your preference (on/off).
- Proceed to the next step to configure the "Display QR Section."
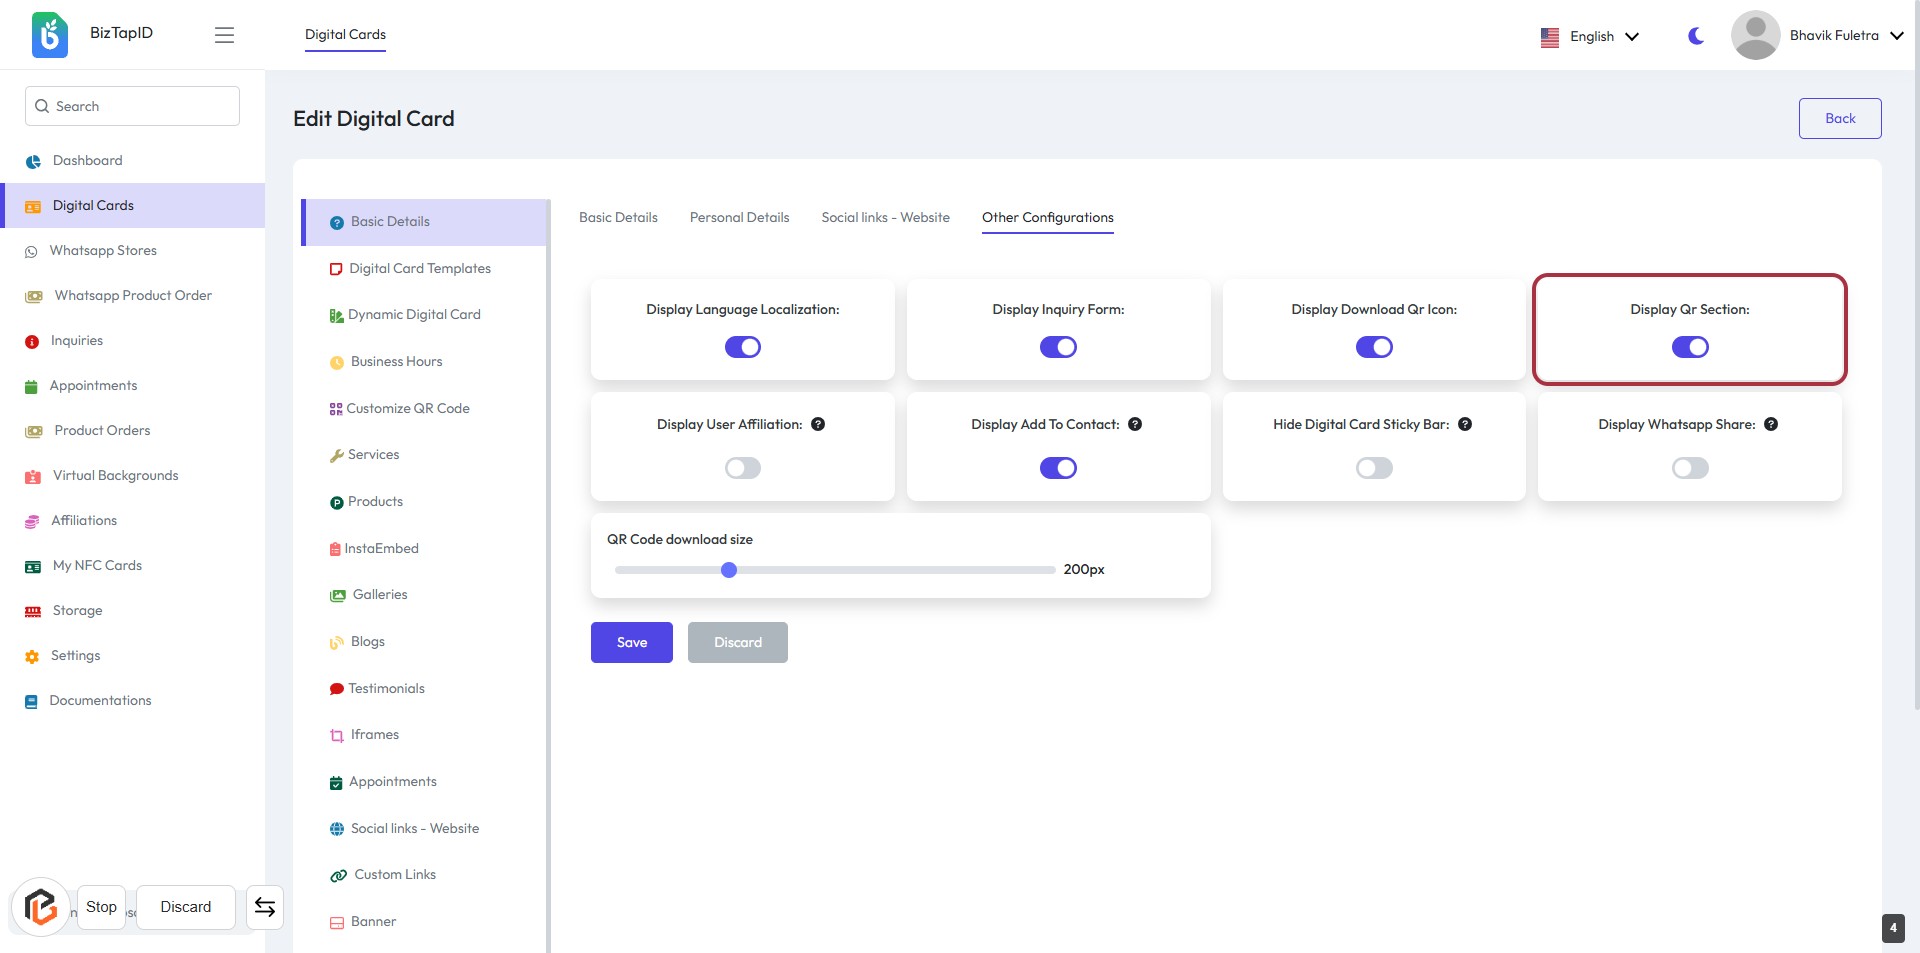
STEP 5: Click to Toggle "Display QR Section"
- Locate the "Display QR Section" option in the Other Configurations section.
- Click on the toggle switch next to "Display QR Section" to enable or disable it.
- Ensure the toggle reflects your preference (enabled or disabled).
- Review other configuration options as needed before proceeding.
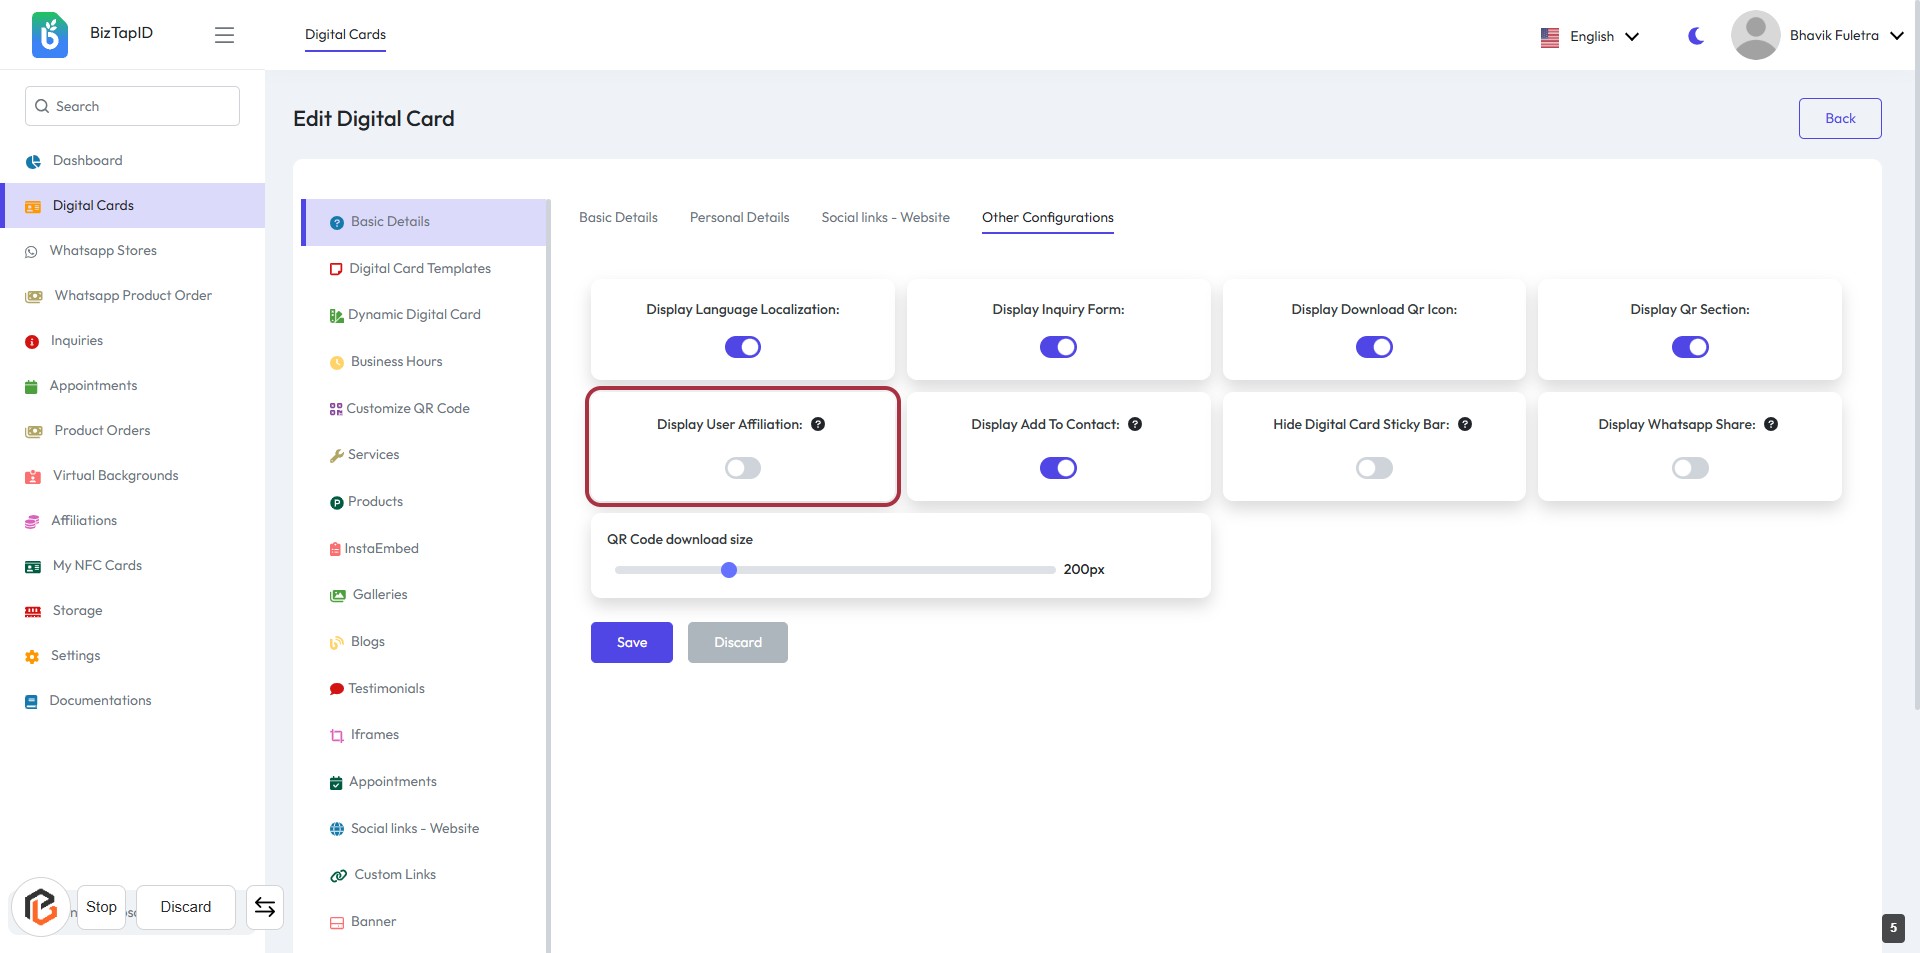
STEP 6: Click to Toggle "Display User Affiliation"
- Locate the "Display User Affiliation" option in the settings.
- Click on the toggle switch to enable or disable this feature.
- Ensure the setting reflects your preference for user affiliation visibility.
- Review other configuration options as needed.
STEP 7: Click "Display Add To Contact"
- Navigate to the "Other Configurations" section.
- Locate the "Display Add To Contact" option highlighted in red.
- Click on the toggle to enable or disable this feature.
- Ensure your preference aligns with how you want the contact information displayed.
- Proceed to the next step to adjust the "Hide Digital Card Sticky Bar" setting.

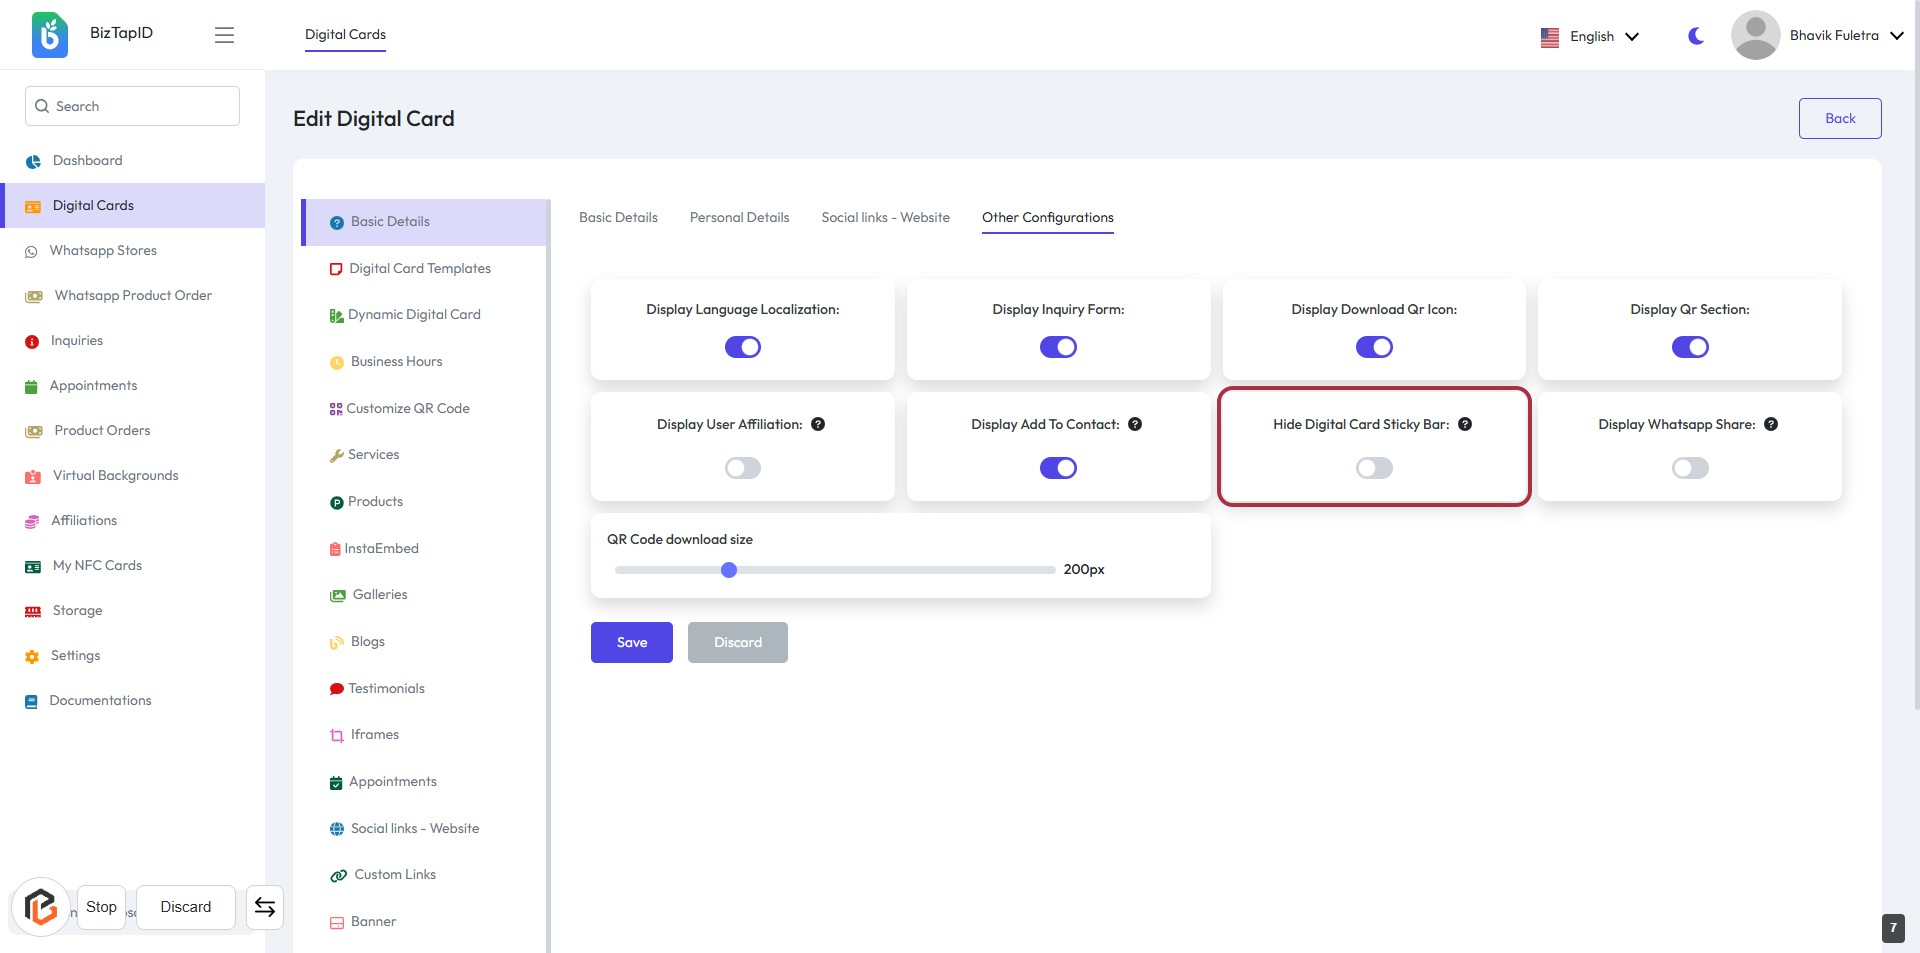
STEP 8: Click "Hide Digital Card Sticky Bar"
- Locate the "Hide Digital Card Sticky Bar" option in the Other Configurations section.
- Click on the toggle switch to enable or disable the feature.
- Ensure the setting reflects your preference for displaying the digital card sticky bar.
- Proceed to the next step by clicking on "Display WhatsApp Share."
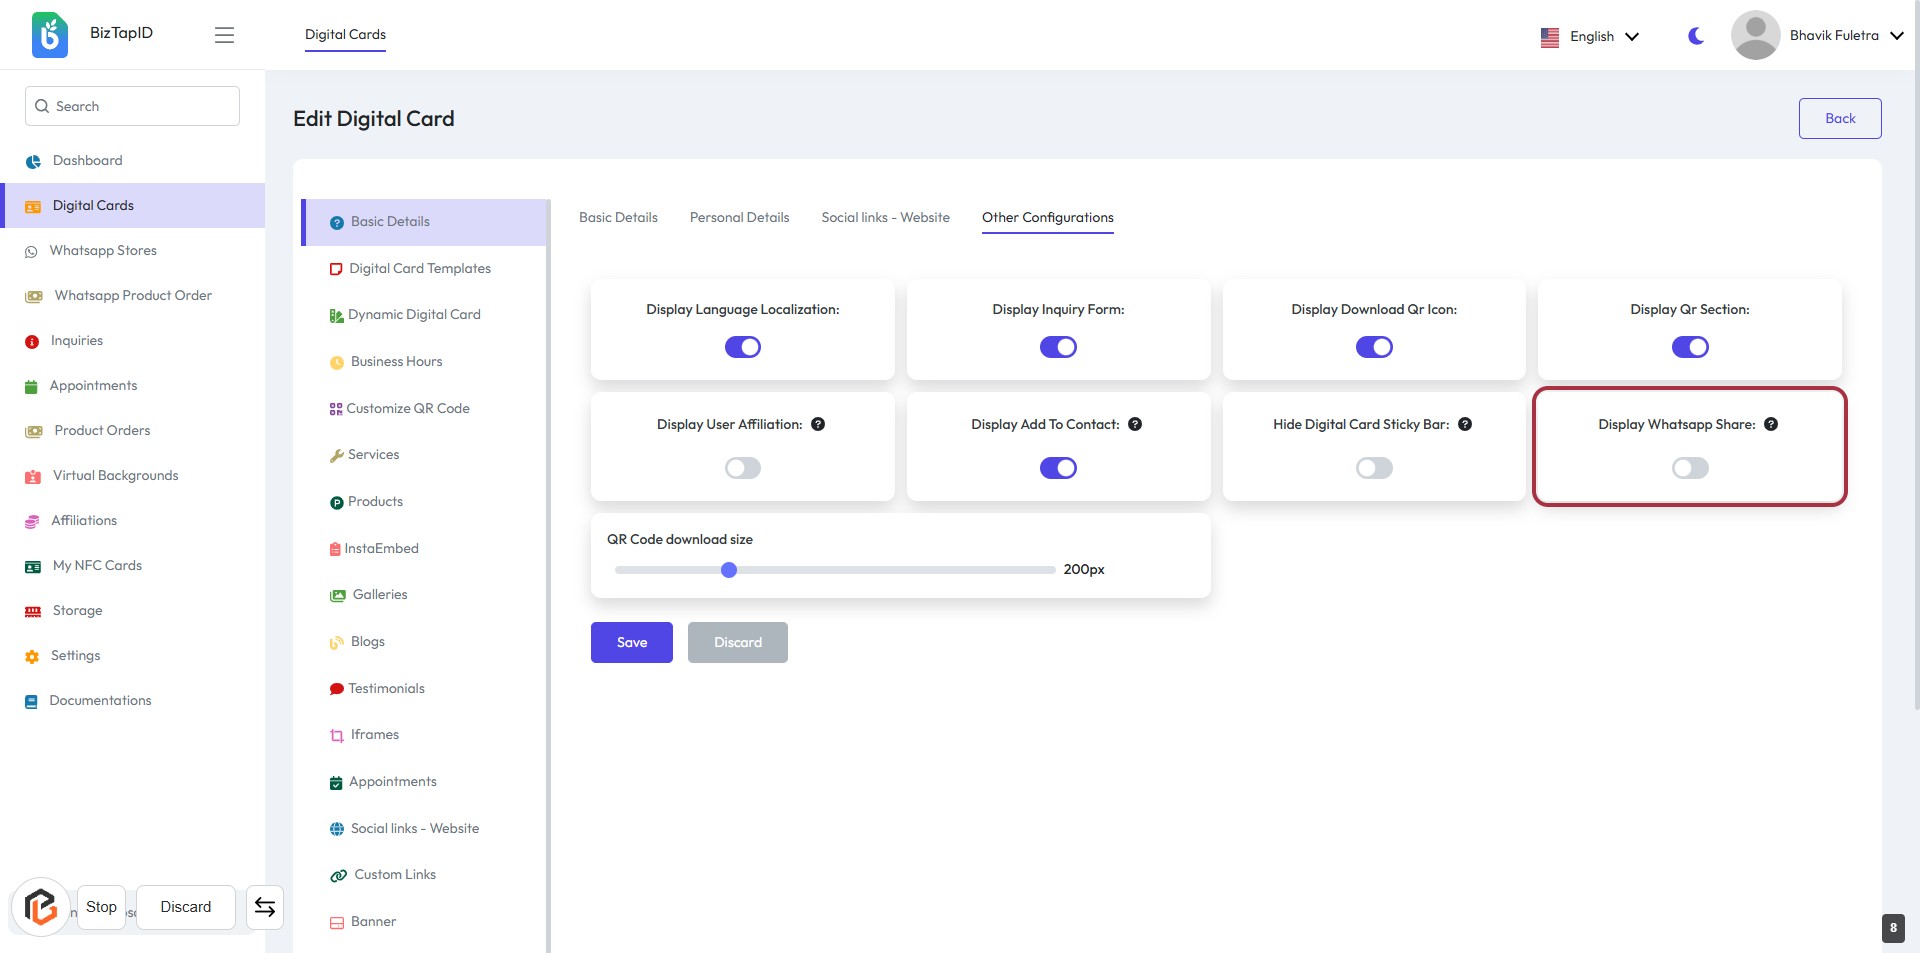
STEP 9: Click to Toggle "Display WhatsApp Share"
- Locate the "Display WhatsApp Share" option in the Other Configurations section.
- Click on the toggle switch to enable or disable the feature.
- Ensure the toggle reflects your preference (enabled or disabled).
- Review other configuration options as needed.
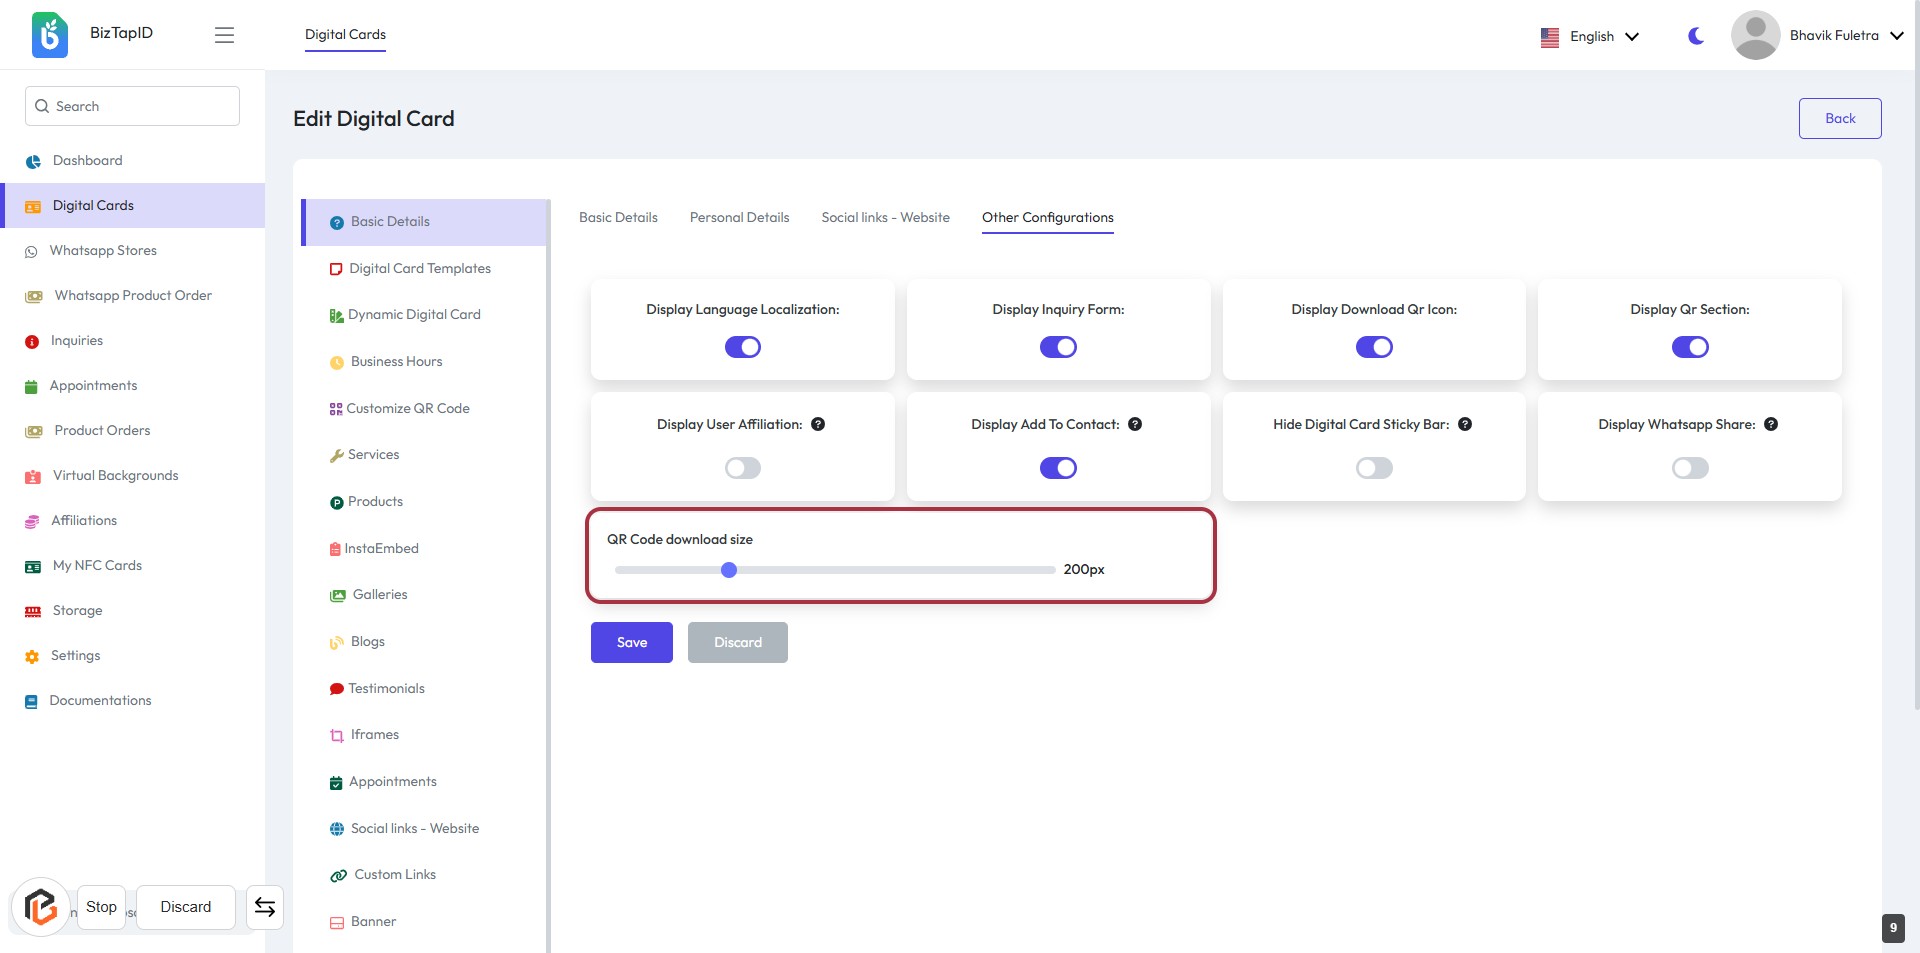
STEP 10: Click on "QR Code download size" to Adjust Settings
- Locate the "QR Code download size" section.
- Click on the highlighted area to adjust the size using the slider.
- Set your preferred size for the QR code download.
- Ensure the size is appropriate for your needs before proceeding.
- Next, click on the "Save" button to apply your changes.
STEP 11: Click on "Save" Button
- Ensure all settings are configured as desired.
- Locate the "Save" button highlighted in red.
- Click the "Save" button to apply your changes.
- Review any confirmation messages to ensure successful saving.